The Post (or Leg) Vise
Last Revised: October 19, 2023
Good question!
A blacksmith's post vise or "leg vise" is designed to be hammered on, unlike most bench-mounted machinist vises.
The long leg transmits the energy from hammer blows all the way from the massive fixed jaw to the floor.
Hot iron is secured in the vise and then shaped as needed by hammer blows.
Although many post vises get mounted at the edge of a bench, the idea of the "Post" is that you can bury a hefty post vertically into the floor of the blacksmith shop and mount the vise to the post. Then you have access to the vise from all sides. In any event, the leg has to be firmly bedded at floor level to receive the power of the hammer blows.
When one sees blacksmith shop layout drawings, the forge, post vise and anvil are strategically located to form a triangle with the smith in the center. That way, the smith needs take only one step from the forge to get to either the anvil or the vise.
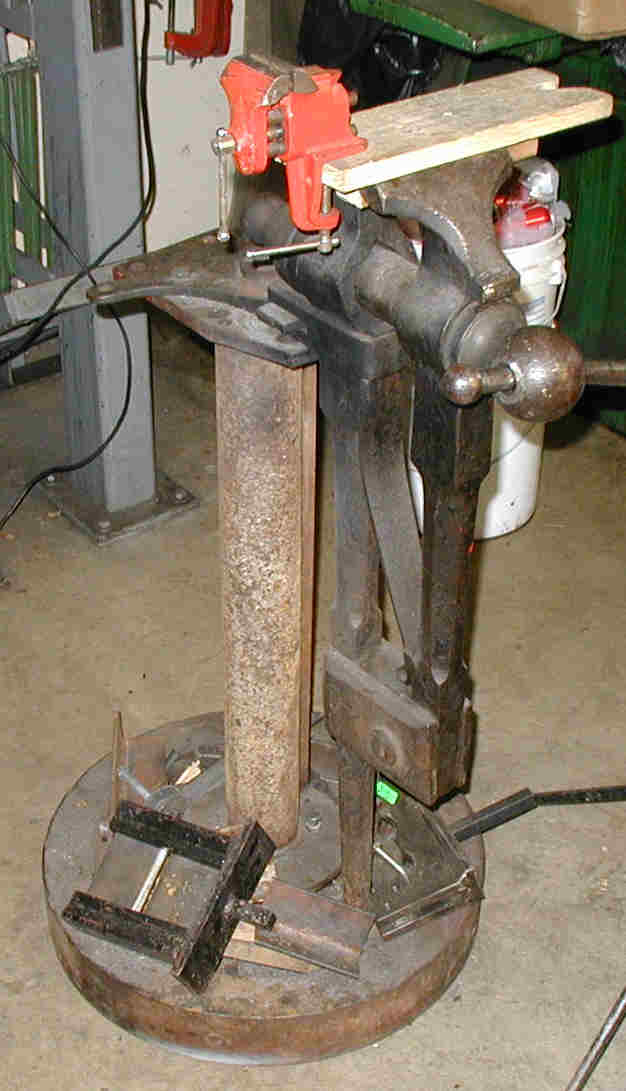
As you see here, below, I mount my post vises on stands so they are movable, but stable. In many cases, we need to bend and twist stock that is clamped in the vise jaws. So there is always a compromise between resistance to moving and rotating vs. absolute immovability.
The blacksmithing part of my home shop is pretty small so I have to move things around depending on the project. This shop has a concrete floor, so the permanent post-in-the-floor idea is out anyway.
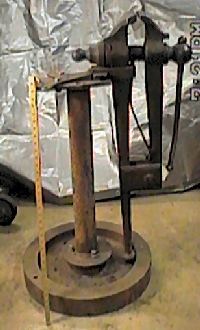
Above you can see one of the first post vises that I have collected and mounted over the years. Note the yardstick
standing up against the vise for scale.
I have paid as little as $20 for one and as much as $60.
The weights vary from as little as 35 pounds to as much as about 75 pounds.
I have collected about 8 or 10 post vises over the years. I know this isn't much of a collection, having seen places
where guys have 20 or 30 of them!
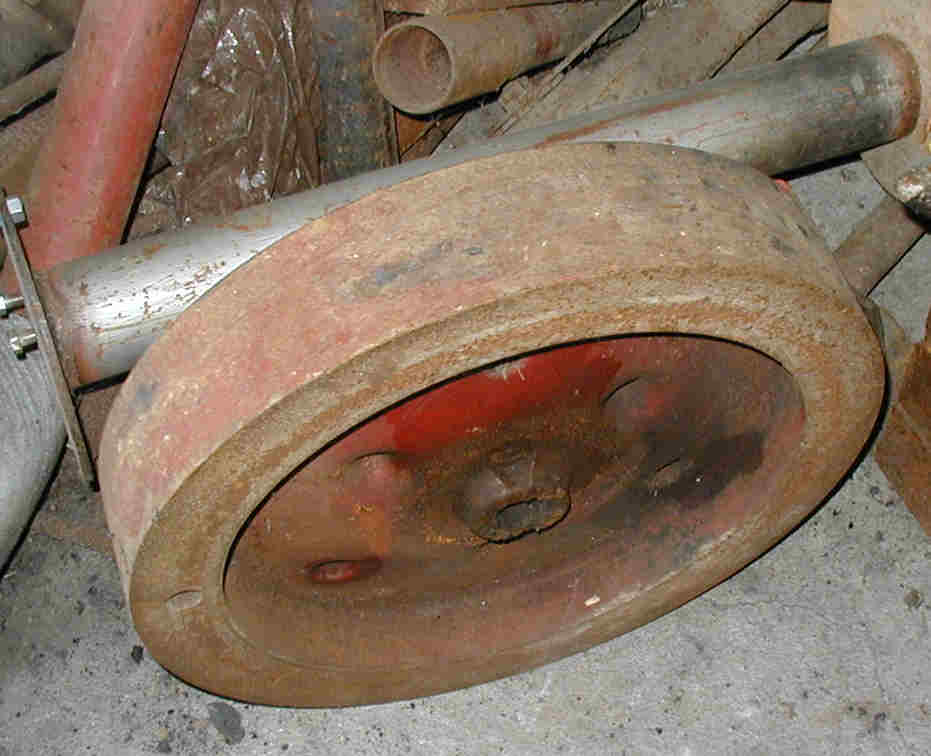
My 2 installed post vises (and 5 other stands I made) are mounted on bases that are 215 pound New Holland model 66
hay baler flywheels. There are many New Holland small square balers that have a similar flywheel: the 68, the 273,
and maybe even as new as the 326.
The point is the you want to be looking for balers that are totally out of service, hiding out in some farmer's "grove",
if you want to get them for a low price.
I got my baler flywheels by simply advertising to buy them in our local shopper newspapers. (We live in western Wisconsin farming country).
Back in about 1990, when I started accumulating those flywheels, I offered to pay $10 each if they were still on the baler or $15
each if the owner had removed it. In all cases, the guy took the $15 route.
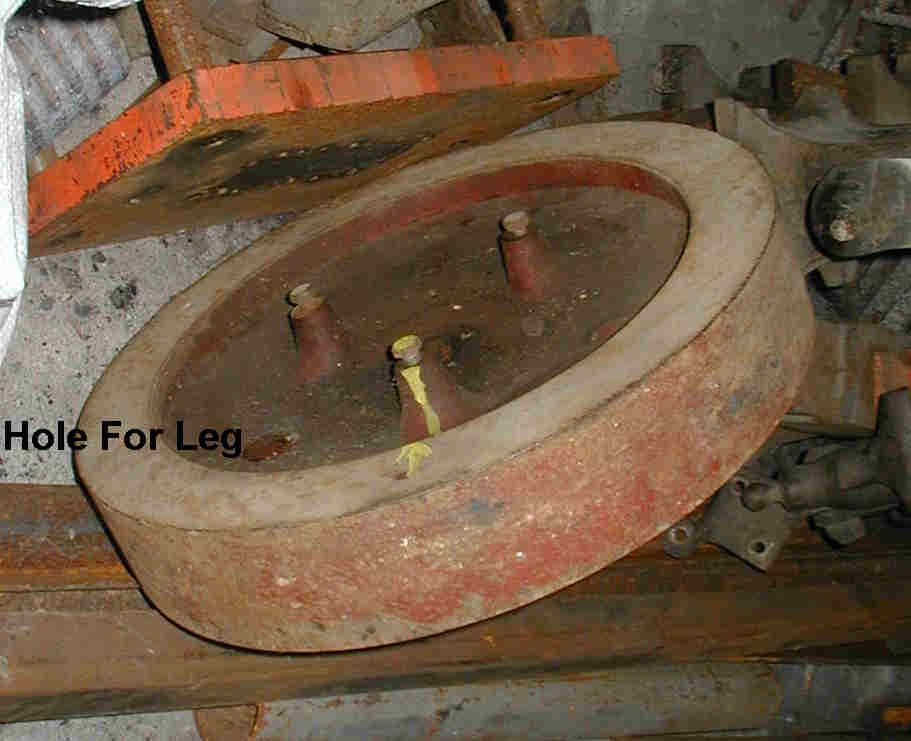
One of the holes in the flywheel is just right for the post vise leg.
However you mount your post vise, consider this:
A well known blacksmith, Peter Sevin, demonstrated at our spring conference in 2007. He wanted to bend some heavy
material, but the temporary mount for the post vise allowed the vise to rotate to easily for the job at hand.
To this he said: "I like to
have at least one place in the shop that has an immovable object!"
I have used post vises at many sites that wiggle around, rotate, are top heavy and/or have no place to lay tools.
You have to make a decision between portability and stability. If you will use most "portable" post vises
on a dirt floor, the floor will NEVER be level enough to keep it from rocking when hot rasping, for instance.
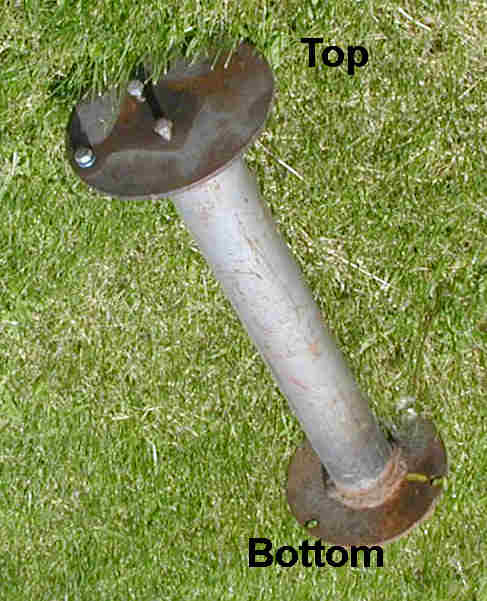
As I said before, my vises mount on 215 pound hay baler flywheels. The whole assembly comes apart into 3 pieces; the
vise, the vertical 3" pipe stand, which (for the future) will have a 3/8" thick, 17" square table
with 1 1/2" high sides on 3 sides, welded to the top of the pipe and a circular mounting flange welded to the
bottom, and finally, the flywheel. I can handle the whole thing myself (age 75) with a 2 X 6 to use to roll the
flywheel into the van.
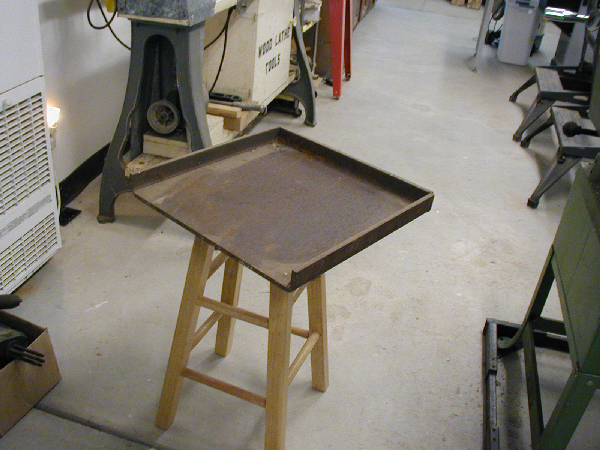
Here's a picture of the tables that I had made some years ago. There are 5 of them installed on the postvise stands
at the Nowthen, Minnesota Threshing show grounds.
A Friend recently bought a Harbor Frieght "skyhook" for about $50 that mounts on the tail of his pickup
truck box. He uses that to hoist his "portable" stuff (like his post vise) aboard.
If I need to really "wrench" on a part in this post vise, I have made a bar that hooks into the
stand that allows me to pull the work and the bar together, like tightening a bolt with 2 wrenches. This works out
very well when I put my HF "mini- hossfeld" bender in the vise to use it.
Finally, no one said that you can have only one post vise.
If there is room, have a portable one that you can move around, close to the anvil and a permanent one on
a heavy bench.
Note that I already burned off part of the hub on the flwheel so it would set flat on the floor. Some models don't have that hub sticking out far enough that you need to cut it off. Note that these pictures are from a different vise than the one at the top of this page.