Pete's Anvil Page
Last Revised: October 21, 2023
Answers to the Forging and ABANA Trivia Crossword Puzzle
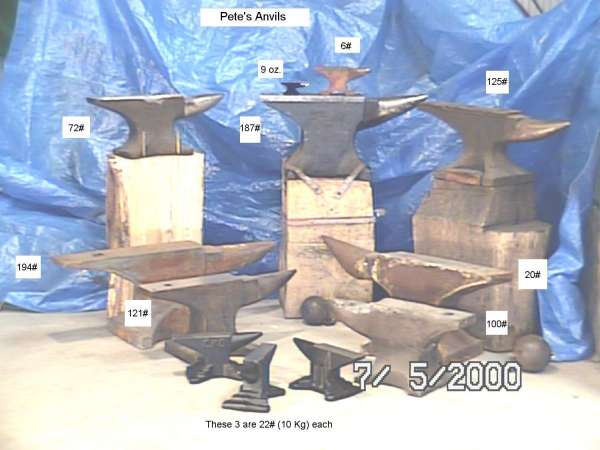
As I looked at that picture, in 2013, I was surprised to see that it's only about 2/3 of the collection that I have
now! And, of course, there are now a few railroad rail anvils around here, too.
But, regarding REAL anvils, I have paid as little as $25 for one and as much as $200.
Anvil prices have soared over the last few years. An anvil that I paid $50 for in 1987 would go for at least $350 today (in 2017).
The weights of my REAL anvils vary from as little as 9 ounces to as much as 194 pounds.
Anvils are constructed from various materials ranging from cast iron to wrought iron with a tool steel face to solid
tool steel.
One of the anvils in the picture is made from sheet metal. Can you guess which one it is?
Although you can't see the faces of the anvils very well in this picture, I have ground the faces on several of
these anvils on my own 8" X 20" Surface Grinder.
About The Way I Grind Anvils
This process does a great job of returning the face to "like new" or close to new condition. I don't reweld the faces myself (yet), I would have that done by friends who have that skill if I needed it done.
In May of 2004, I completed grinding to the 23rd anvil to cross my grinder.
This one required removal of 101.25 thousandths of an inch of material from the face. The owner wanted the base to be made parallel to the face, so, after grinding, I turned the anvil upside down and mounted it on the vertical mill. I had to remove 0.390" to true it up.
Here are a couple of pictures of that anvil, one with the face showing and one with the base-trueing complete while the anvil is still mounted on the mill.
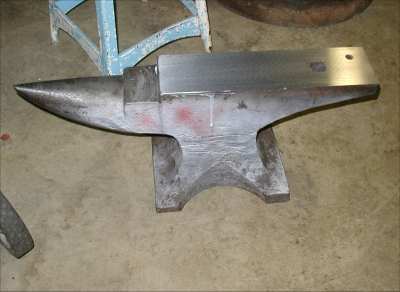
Customer Anvil after grinding
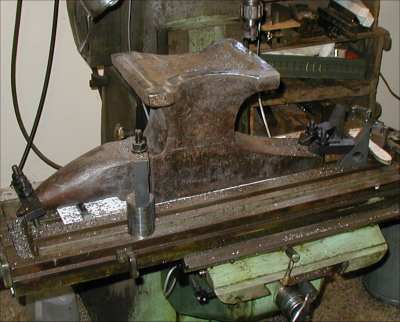
Anvil upside down on Mill for leveling the base
Recently, I heard about a 110# cast steel anvil that sells "brand new" for less than $100. I bought one to check it out. See the HF 110# anvil link above, for my opinions. Unfortunately,it may not be available anymore, but you might try to get one on E-bay or look for a used one.
12/31/2010:
Here's a Question about preparing a newly acquired anvil for use.
I just acquired a vanadium steel 70# anvil in as found condition.
Any suggestions as first steps in putting it into service? It has been outside for years in Montana.
Pete's Answer:
Hello, Ken.
A photo would help a lot, here.
If the face of the anvil (the main work surface) is fairly smooth and if the horn is pretty much intact, all I'd do
is to sand the rust off with some 60 grit sandpaper. Once the rust is mostly gone, switch to 150 grit sandpaper to
shine things up and start using it.
Of course, if you have an angle grinder you can speed this process up a lot.
The face of the anvil is usually pretty hard, so you shouldn't have much trouble with digging in to that surface with
the angle grinder. But, the horn is usually a lot softer, so be careful there until you get a feel for how hard it is.
The edges of the anvil are important to a blacksmith because they are used to start shoulders. So, if the edges are
ALL chipped off this presents a problem. But, even if there is some chipping of the edges, as long as you can find
an area a couple of inches long on both the close and far sides of the anvil, you can still do good work with it.
Here are four pictures of two different anvils that I'd consider to be pretty bad. As you look at these pictures, you can
see that both edges of both anvils are really chipped badly.
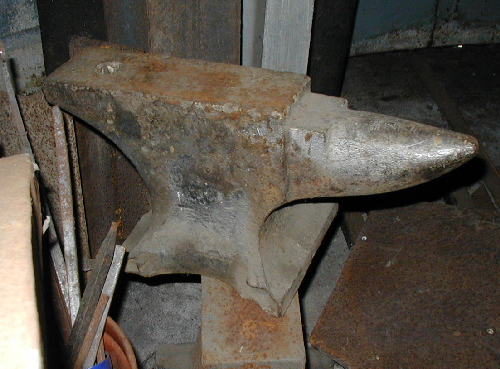

The anvil above has a cast iron anvil's typically short horn, but this one is in pretty good shape and it is well rounded
compared to other cast iron anvils that I have seen.
But, the edges are badly chewed up. If this were an anvil with a tool steel face, it would be a good candidate for
extensive repair of those edges. It would be pretty hard to do any goood blacksmithing on this anvil. This is about a 50 pound
aanvil.
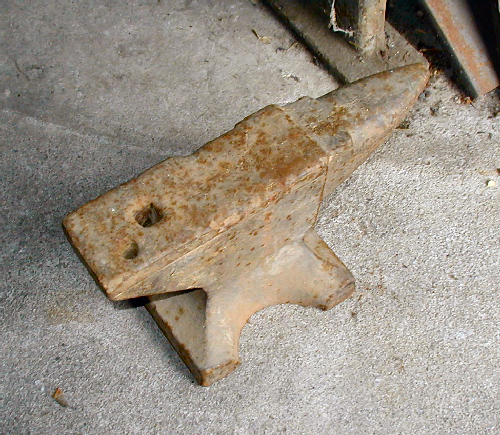
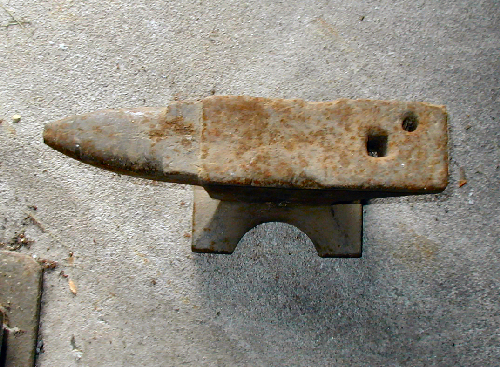
Some people call an anvil that is damaged as badly as this one is a "Doorstop", because that's about all it's good for.
Again, note that the edges are all chipped away on both the near and the far sides. Can you see that there is a huge "dip"
in the center of the face? That is also bad. For what it's worth, note that the horn on this one is almost flat on top.
This makes the horn almost useless for drawing or for forming arcs.
These are pretty much worst case situations. Note that both
of these anvils are cast iron. I would not recommend a cast iron anvil for blacksmithing at all, but these two anvils do
show the conditions you want to avoid.
The face of the anvil should be nice and smooth and free of nicks in the area where you work on it. If there are any dings,
you will impress that ding into your work every time you hit it with the hammer.
The most important tool for the anvil is the hardy cutoff tool that fits into the square hardy hole.
You should get one that fits you anvil as soon as you can. They come in two basic styles,
the hot cut off tool and the cold cut off tool. The hot cut has a pretty sharp edge, since you will only cut hot,
soft material. The cold cutter has a wider angle to the edge to give it more support,
since it is used to cut stock off cold.
I Hope this helps folks in evaluating an anvil.