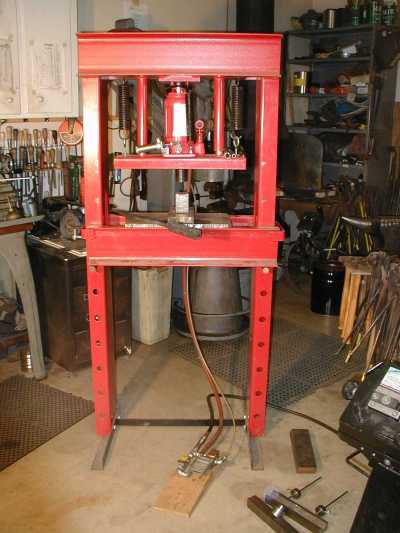
Here's how the press works as you buy it:
The 20 ton hydraulic jack does all the work. When you buy one, you use muscle power to pump a handle on the jack which,
acting on a small
piston, forces oil from the jack's reservior into the main (much larger) cylinder, pushing the main piston up a tiny
bit with each stroke. Since the piston is pushing against the top of the press frame, that effort simply pushes the
base of the jack, and therefore the spring loaded jack stage, downward. There is a small valve in the base of the
jack that releases the oil to allow the jack piston to retract. You have to twist this valve 1/4 turn ccw or so
(using the end of the jack handle) to let the piston return. That's the standard 20 ton press that you buy for
$250 or more, these days.
Note that on this style of "Bottle Jack" press, the jack stage is well guided.
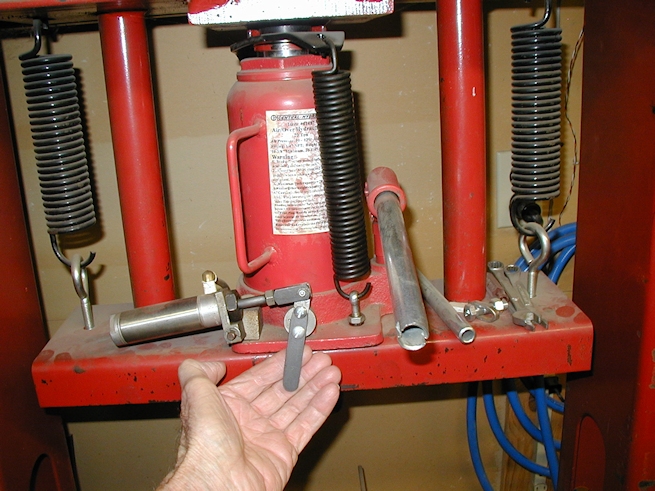
Here is the release mechanism. The white plastic hose goes directly to the output of the 3 way valve on the floor.
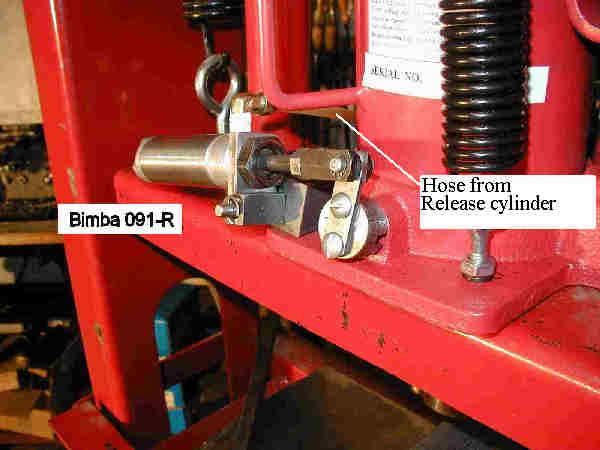
-The release valve that comes with the jack is just a 1/4" diameter needle valve that you have to twist with the
jack handle. I made the knob (which is held onto the needle valve by a set screw) and the arm that attaches to the air
cylinder clevis. The arm gives an effective radius of about 1". I also made the bracket that the cylinder is
connected to and the angled bracket upon which the air cylinder pivots. That bracket is held to the base of the
jack by a 1/4-20 screw into a hole I drilled and tapped into the base.
There are some times when I don't NEED or even WANT to use the air pressure, so I just pump the jack by hand.
-Or if the air compressor isn't pumped up and I am too lazy to go into the next room to plug it in and wait.
For those times, I have added a little HANDLE onto the pressure release knob that the little
air cylinder is attached to. It also gives me more precise release control when I am doing fussy work.
Even if you don't add the air-over-hydraulic jack or add this release cylinder, I recommend that you DO add a knob
onto the jack's release valve. Once the knob is there, you don't have to grab for the jack handle to get the jack to
return.
Here's a picture of a release knob that I made before I started this "automation" project. It is currently fitted to the
non-air powered jack that I took off the press.
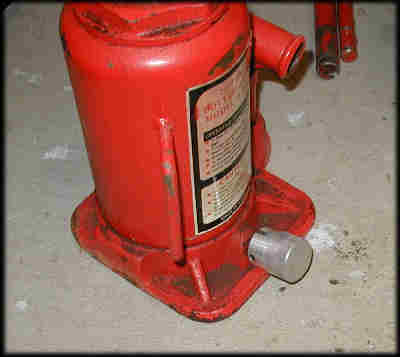
If you want to make a knob like this, Click Here for a fully dimensioned drawing
The release valve shafts for both of my jacks have a small hole cross-drilled in them and a pin inserted. That pin is
what you turn with the jack handle to rotate the release shaft. In some cases, I have seen jacks where the mfr. has simply
sqaushed the end of the release shaft instead of using the cross pin. If this is the case with your jack, you'll have to
modify my design accordingly.
Foot Operated Valves
120 psi air comes in from the compressor through the black hose (with a quick disconnect)to a tee, then to both valves.
The white plastic hose leaving the larger valve on the right (that's the "3-way" valve) goes directly to the Bimba release cylinder.
The red hose goes from the smaller valve on the left, directly to the air motor on the back of the air-over-hydraulic jack.
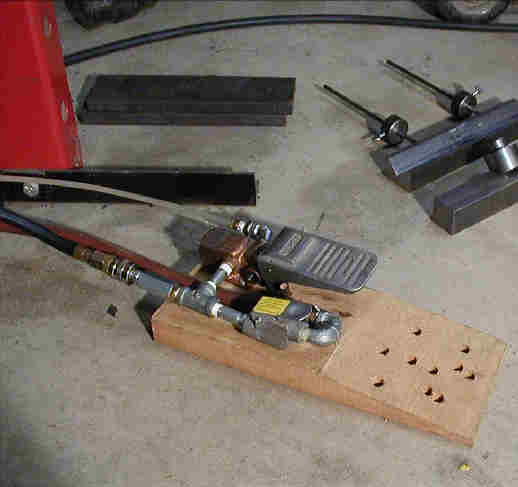
The little valve that is closest to the bottom of that picture is the valve that comes with the air-over-hydraulic jack, on the end of a 3 foot long air hose. Obviously, I had to replace that short hose with a longer one. It has a little thumb-operated lever (which I now operate with my foot). It simply lets air into the jack's air motor to make the jack work (putt-putt-putt).
I found this 3-way foot valve in a box of stuff I got at an auction years ago. When pushed down, this 3-way valve sends air to the Bimba air
cylinder to pull it IN which rotates the release valve about 1/4 turn ccw, allowing the jack to relax back to its shortest position.
When you release the foot pedal, the valve opens the air line from the cylinder to the atmosphere to let the pressure out of the Bimba air cylinder.
The return spring inside the cylinder pushes the jack's release valve clockwise to close it.
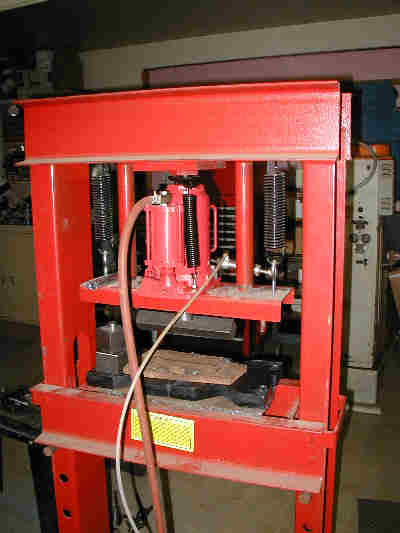
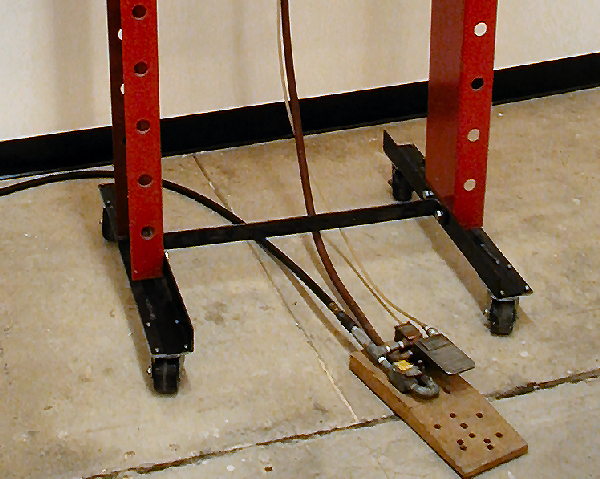
I recently put the press on casters. That way I can move it into the currently active work area when needed, then back into a corner when not in use.
Add a pressure gage so I can get an idea of the force I am using.
A fellow Guild of Metalsmiths member told me how a friend of his modified this jack for a gage port, but I haven't done it yet. Click this link to see
what he told me: Adding a Gage to your 20 Ton Jack
I haven't tried it yet, so you are on your own.
Simplify the release mechanism: For those who don't want to go to all the trouble of adding the release cylinder and valve, I may someday try to replace the "Bimba cylinder" mechanism with a autombile clutch cable or bicycle brake cable. That would also make it cheaper to build.
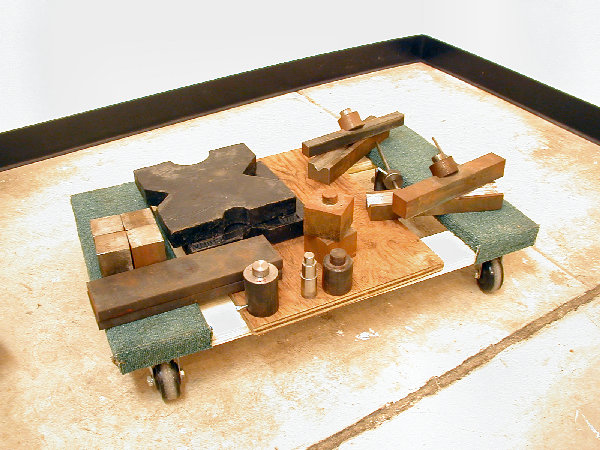
I have made a couple of different 10" long press brakes for it and they work quite well for sheet metal up to 1/8" thick and maybe 16" wide. The press throat is about 20" wide. I have even bent 1/8" mild steel 16" wide to 90 degrees by making partial bends and moving along. So far, I have used mild steel for most of the dies. I have simply used mild steel square bars on the diamond for the upper die and machined a 45 in the lower die. In the future, I intend to make (or maybe even buy) a more conventional press brake accessory.
The home-made Press Brake in the lower part of the picture can bend 12" of 3/16" thick mild steel to 90 degrees. And, of course the machine
comes in handy most often for pressing bearings, straightening and flattening.
An example of flattening: A friend chiseled and chased 6 very fancy 4" by 12" facets for a dining room chandelier.
By the time he was done, the mild steel panels were warped a lot from all that cold working. We simply pressed them between them between 2 pieces
of 1/2" plate and they came out remarkably flat. Flattening by hand hammer would surely have stretched the metal more and obliterated some
of the fine details.
You can even use it as a clamp to hold work pieces together for drilling or for welding.
My air-over-hydraulic jacks (I have made 2 of these machines, one for me and one for a son) came from H-F in about 2005 or so and neither one has leaked yet, as of 2016.
I'm not saying that this is the only way to accomplish foot controlled operation. I just hope that you can use some of these ideas here to produce your own hydraulic press solution.