How NOT to steam bend wood
Last Revised: October 22, 2023
French Creek Valley Home Back to Our Forestry Page
Contact Us
I challenge anyone to document a mistake different from all the boo-boo's that I have made so far.
All I wanted to do was to make a replacement sled runner or "ski" for a small firewood-carrying sled.
The owner brought me the broken off tip of the bad runner and also the still-intact runner from the other side of the sled.
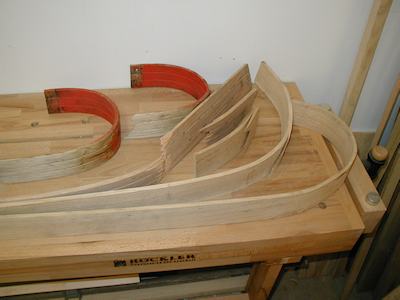
The finished runner is about 5 feet long and the front end is turned slightly over 180 degrees on a 4" radius. The stock length is about 72",
with a cross section of 2 3/4" X 11/32".
Much of this webpage and the accompanying
Steam Bending
video is simply Me practicing the process. I hope the reader sees this mostly as "what not to do"
and uses all my mistakes as a learning experience.
You might be wondering where this thin 3/8" thick wood is coming from. Well, I had been planing 4 quarter boards down to the thickness that I needed.
But that sure is a waste of time and planer blades. Well, 25 or 30 years ago I bought a huge old bandsaw that I planned to set up just for resawing wood into
thinner sections, but never got around to even setting it up.
So just recently (summer of 2016) I did revive that saw. It was a pretty big job, but it is finally operational, although I still plan to speed it up some more
since the blade is only running at about 1000 SFM (surface feet per minute).
Well, later last year, I made some pretty nice improvements to the bandsaw and even completely rewired the building that it's in.
Now it's running at 2000 SFM and it has a brand new "Wood Slicer" blade.
Here's a link to the first of five youtube video about
reviving this 36" wheel bandsaw from the 1920's

Supporting the OUTSIDE of the bend:
My original fixture was simply a 7" diameter cylinder of wood that was about 3" high. I screwed it to a sacrificial plywood "table" and clamped
a block of wood 3/8" away that would trap the piece while I bent it. This setup gave me my first 3 failures.
I have seen videos where the craftsman successfully used this process, but it didn't work for me. See:
Steam Bending A Toboggan / Sled
After MY own failures at doing it that way, I did more investigation and found the idea of using a metal strap to contain the outside of the bend,
and to keep the piece from stretching, so I changed to that method:
When bending wood around a form, the outside wants to stretch, the inside wants to compress and half way in between it wants to do neither (neutral zone).
But, to get best results without splintering of the wood at the outside, people use a metal strap to trap the wood so the outside edge can't stretch at all.
This causes ALL of the dimensional change to occur as compression toward the inside edge of the bend. The part is placed onto a metal strap that
has blocks firmly attached to it at both ends. The space between the blocks is exactly the same length as the piece to be bent,
just before the bending commences. The steamed wood is placed against the inside of the form, the metal to the outside,
and the whole thing is slowly but deliberately bent toward the form. The wood blocks at the ends of the metal strip keep the outer surface
of the piece from stretching at all. I my case, I couldn't trap the whole ski blank between blocks, so I placed the end to be bent
against one block and tightly clamped the other end of my 36" long metal strip to the blank farther down its length.
I saw one video where the craftsman eased the edges on the pieces with sandpaper after bending. It occurs to me that doing this BEFORE bending would
be a good idea to minimize splitting.
