Here are a pair of Three-Legged Saw Horses that I made for a gate and railing job some years ago.
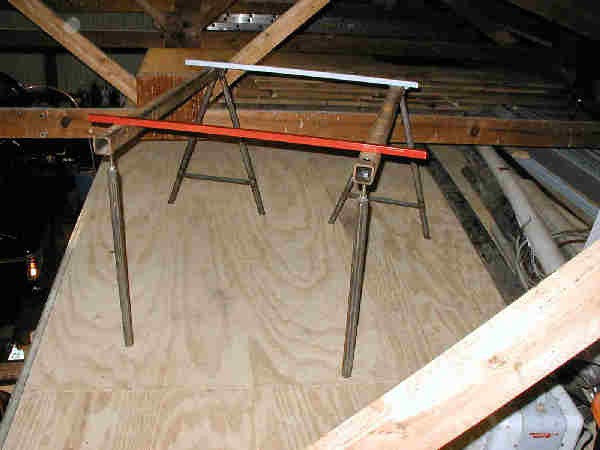
-They never need shimming to make them sit flat on the floor. (No "Wobble")
-The single leg is adjustable for leveling.
-They can be taken apart for storage.
These "Horses" are used as a pair to support components that need to be welded up, as in fabricating a gate, etc.
It is usually important that a fabricated assembly be flat, so the horses need to have their top surfaces perfectly parallel;
that is- they must both be in the same Plane.
The threaded adjustment in the single legs allows for this.
In this application, "Level" is not very important, but "parallel" is.
Winding sticks have been around for a long time, but many people outside the woodworking community may not have seen them. Pepin Wisconsin's Bob Walsh introduced me to them. They are a simple way to make certain that two surfaces are in the same plane. Woodworkers use them to tell if a board is flat when planing it.
To use the Winding Sticks:
-Set the saw horses side by side, close enough so the winding sticks will fit on them.
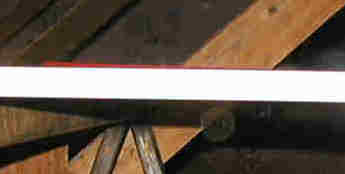
-Lay the white winding stick across the saw horses at one end (whichever end is best for you).
-Lay the red winding stick across the saw horses at the other end.
-Get down so your eyes are level with the plane of the sawhorse tops and sight across the winding sticks.
Adjust your eye height so you can see across the top of the closest winding stick. As you move your head up and down
slightly, you will be able to see the other winding stick, too. If the two sticks are perfectly parallel,
the rear stick will disappear totally, all at once, as you move lower.

-If you can see only a part of the rear stick at some point, then you know you have to adjust the single leg of one
saw horse or the other.
-You can Easily get within 1/64" of "Dead Flat" this way.
I made the tops of the saw horses 4 feet long, using 2" X 2" X 1/4" wall tubing. The "cradles" for the removable double
legs are made from 2 1/2" X 2 1/2" X 1/4" tubing, with one side cut off. The adjustment screws are 1/2-13. But you
can make these 3 legged saw horses any size you want or need.
The finished height of these saw horses is 28 inches.
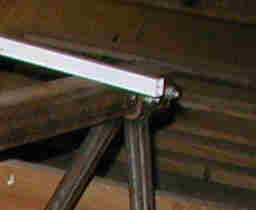
-Single Leg attachment:
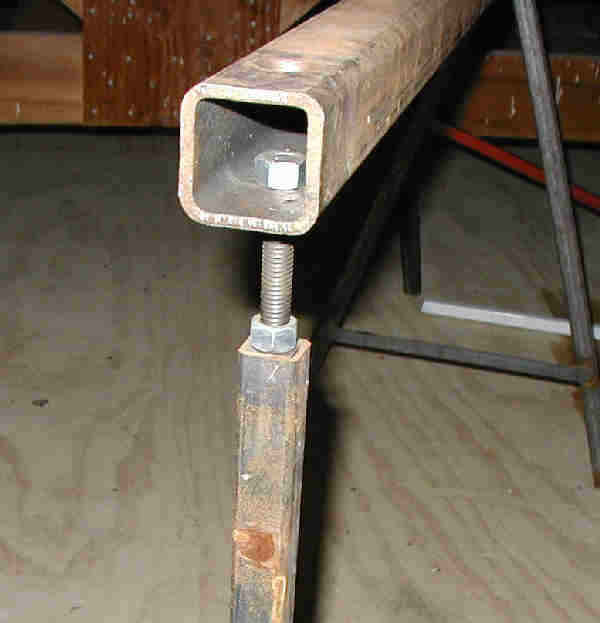
The legs are made from 1" square tubing with about a 1/8" wall thickness. To attach the threaded adjustment rod, I drilled
a couple of inches into a roughly 6" long piece of 3/4" square stock and threaded it 1/2-13. I drilled a 5/8"hole about 4" down
from the end of the tube and plug welded the internally threaded bar in place.
As you can see, I drilled a 1/2" hole in the bottom side, an inch or so from the end, of the 2" main tube for the
threaded rod to fit through, and then a larger hole, (big enough for a 3/4" socket) in the top surface.
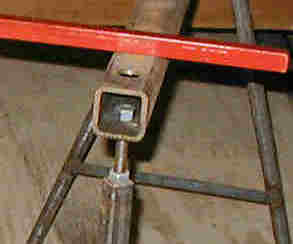
-Double Leg Attachment:
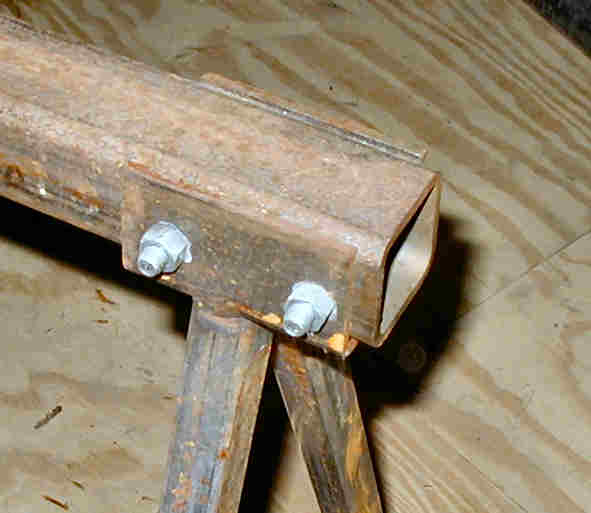
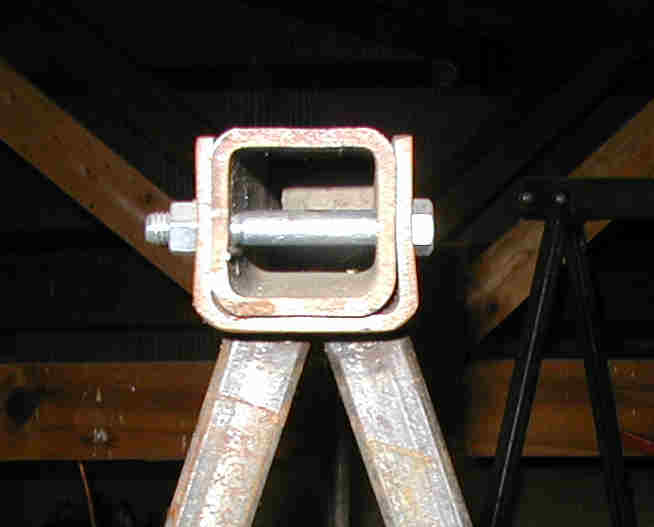
The bracket to which the double legs are welded, is about 4" of 2 1/2" X 2 1/2" square tubing with 1/4" wall.
As you can see from the pictures, I cut one side off the 4" piece to make a "U" shape that the beam of the saw horse sits
in.
I think 3/8-16 bolts should be plenty for the attachment.