First Test of JXQ10A
Last Updated: April 21, 2020
French Creek Valley Home Back to Our JXQ-10A Main Page
Contact Us
Today, April 20, 2009 was our first test of the Chinese gasifier system. We were supposed to have burned off 70 acres of our
Western Prairie today, but it rained yesterday and the grass was still too wet.
So, since we were chomping at the bit to run this test anyway, we just moved it up one day.
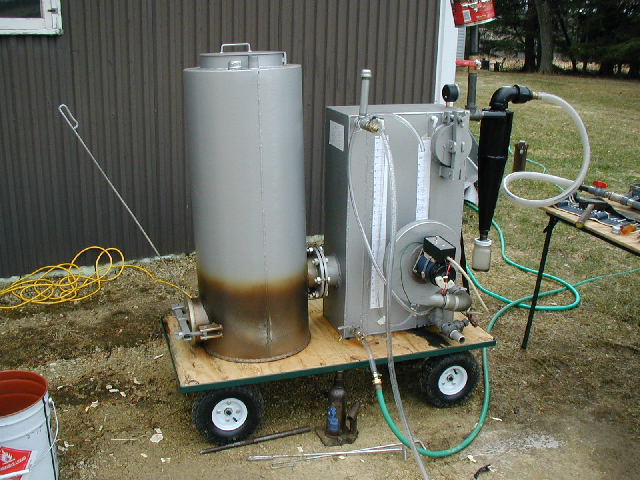
You can see the test setup above. You'll note that there's a quickly-added coffee can over the
flare because of the high wind gusts today. We also had a number of gas and water leaks to deal with.
Some we fixed right away and some we noted for later repair.
About the Fuel (woodchips):
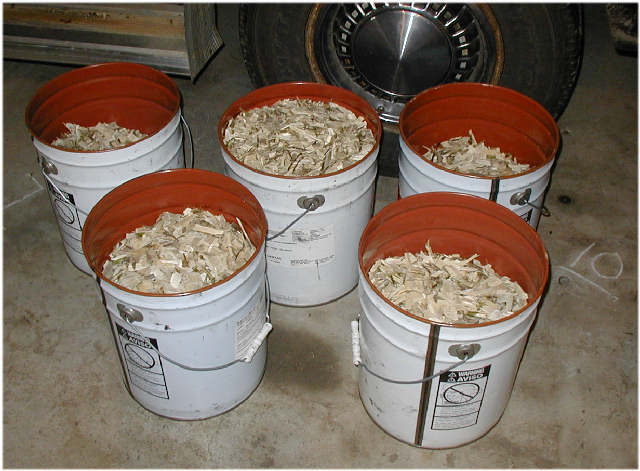
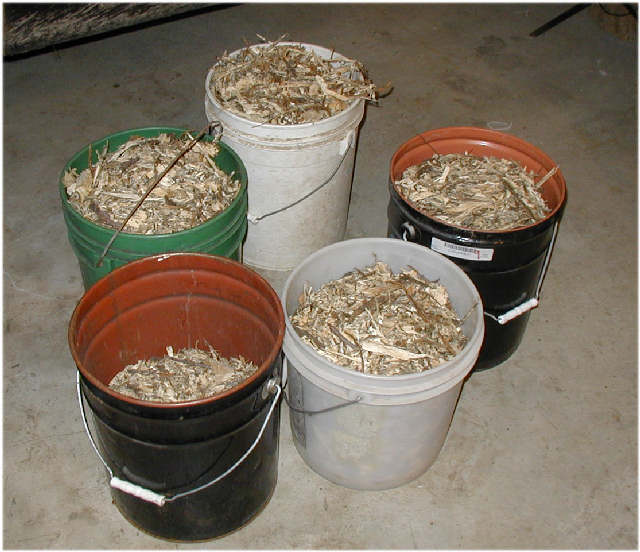
We used mostly these (Below)freshly cut and well dried Box Elder woodchips. they were made from tree branches and trunks that were probably
3 to 8 inches in diameter. This means that we had mosly solid wood (Good) and very little bark and tiny branches (bad).
Weather Conditions: Outside air temperature= 33DegF. Wind WNW 8mph gusting to 16mph.
Gasifier: We tossed some wadded newspaper onto the hearth so wood chips wouldn't fall through, then
added 3 or 4 inches of wood chips. We tossed several sheets of wadded up lit newspaper on top of that and turned on the
blower. We quickly realized that we had to break up bridging every 5 minutes or more often during the first half hour
after start up. A lot of smoke/water vapor was exiting the flare during this time, but, of course, it wouldn't ignite.
The temperature of the outer shell of the gasifier, measured about 8 inches up from the bottom, rose from ambient to a peak
of 560DegF by 12:46, then declined slowly toward 238DegF by the end of the test. We were concerned about this decrease in
temperature, but the gas quality only got better, we think.
All the paint has burned off the bottom foot of the gasifier.
Cooling for filter: We connected a garden hose to the lower valve on the left hand tank, allowed the tank to fill
from the hose and then allowed the water to exit from the top valve and run down the driveway using a piece of
1/2" diameter tubing to keep that water out of our way. We set the water flow to 0.4 gal/minute.
The goal, of course, was to cool the gas as much as possible.
Incoming water temp was about 48DegF and the tank reached a high of 89DegF at 1:15 PM, slowly decreasing to 57DegF by the end of the test,
even though the quality of the gas produced seemed to be improving all the time.
Lower Water Tank: We filled this tank with about 3 1/2 gallons of water, until it would just run out of the little tube on the side of the standpipe. I dropped a fishing bobber with a tall stem down this pipe so I could see the level of the water in this tank vary, and I kept watch on it during the test. As soon as the blower is turned on, we can see the whole blower pressure across the differential manometer and it stayed pretty constant at +3"WC left and -3"WC right side. But, the outpur gage kept fluctuating between 0 and 2"WC or 1 and 4"WC during operation. We could almost constantly hear a "gurgling" sound that was in sync with the gage's movement. We need to learn more about this.
The whole test took place between 12 noon and 2:10 PM. We burned 15 3/4 pounds of wood chips.
We lit the gasifier at 12:20 PM and it took until 1:12PM to get a flare and then to get the stove that came with the kit to light up. We weren't able to get the second burner to light. When we tried, turning on the second burner caused the first one to go out.
You can see from the picture that we added a "GEK" cyclone separator to the output gas stream. We collected about 1/2" of black stuff in the pint mason jar. This is stuff that would have ended up in the stove or in an engine. Looks like it was a good idea.
What's Next: We will do this test again, when we have less wind and after we've fixed a few leaks.
We need to learn more about the "chuffing" or "puffing" sound that occurred at the stove or at the flare during most of the run. It's not an internal explosion, folks.
We are pretty sure its caused by the blower sucking water up into the center chamber just high enough to expose the right hand
chamber for a moment.
Later this week, we hope to bring home an engine to test on the gas. In the meantime, we have about 400 pound of wood chips
drying in a shed.