FRENCH CREEK VALLEY MAPLE SYRUP DIARY
Last Revised: October 19, 2023
1995,------our First Year---OUTSIDE!  1996,----We built this neat Sugar House
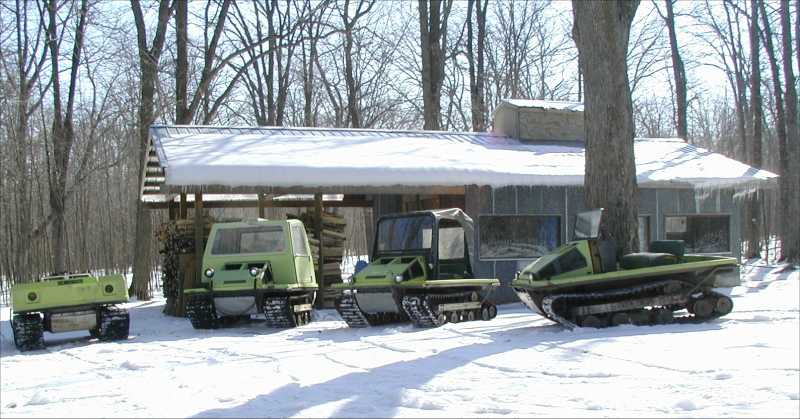
 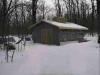 1998,-We added covered wood storage
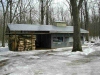
Here's how we get around in the sugarbush (Click for More Cushman Tracksters) 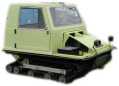 Go to Rick's Vintage trackster Website
History of making maple syrup at our farm in the French Creek Valley. And How To Make it Properly
10 minute Youtube video of Finishing Syrup in our Sugar House
Home
Maple Cooking Metrics
Maple Syrup FAQ
Tracksters
Forestry
Contact Us
Contents of this page:
1. Our first Year (Everything That Could Go Wrong, DID!
2. The Second Year; The Sugar House Is Up; Many Improvements
3. Covered Wood Storage and a Grate System
4. Faster Cooking and Better Bottling
5. Pictoral Summary of our Syrup Making operation
6. 2006, Putting it All Together
7. METRICS Here are the Important Things we Measure and how we do it
8. Filtering and Bottling
1994, Our First Year Making Maple Syrup out in the Cold and the Mud
The HOOK
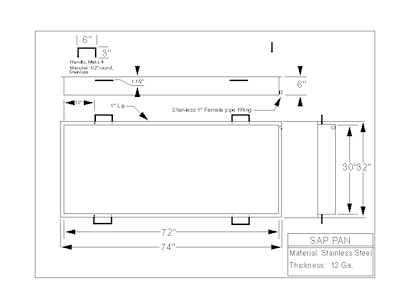
During the fall of 1990, Wes Sanders, retired county soil conservation department manager, gave us a 2 1/2 ft by 6 ft by
6" deep sap pan. He and his sons had been deer hunting on our land for a number of years and the fact that we
might someday make syrup again as we had in the late 1970's prompted this gift. It sat in our machine shed for a
number of years.
Then, in December of 1994, our youngest son Rick suggested that he make some maple syrup up in our woods as he and
his friend Matt Rominski had done once in the middle '80s. He wanted to do this so Mary (wife to be), Tascha and
Tina (his daughters) could see how it was done; to allow them to experience the process for themselves.
I think he had about 50 taps in mind, and he planned to refurbish the existing arch (left over from the firing
that he and Matt had done years ago). He asked Sheran (my wife) and I if we'd support his venture. It sounded
good to us. As a matter of fact, we (I?) had given some thought to setting up an evaporator after we retired
(somewhere around the year 2000) to give us something to do OUTSIDE in the early spring.
PREPARATION
Dec., 1994 - Feb., 1995
We gathered up supplies. We had previously been given some Maple syrup supply company catalogs by Steve and Roxanne Kiefer.
We got a copy of The Maple Sugar Book by Helen & Scott Nearing, copyright 1950, from the St. Paul
Public Library. We found a short pamphlet on Maple syrup making at the St. Croix County Extension office.
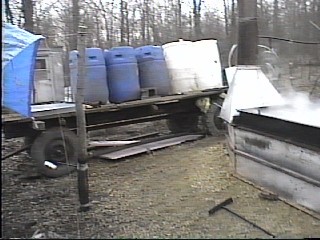
We bought 150 spiles @ 25 cents apiece, 150 4 gallon mayonnaise pails @ 50 cents apiece, 5 blue 55 gallon plastic drums
@ $8.50 each and 3 66 gallon white plastic drums @ $12 each. Then we purchased 150 heavy blue plastic bags to fit over
the pails as covers.
To hang the pails on the spiles, we decided to poke a hole in one side of the pail, just below its lip. That way
the pail could be slipped over the spile and it would "catch" on the little hump on the top of the spile. Here's how we
made the holes:
We sharpened a piece of 3/4" electical conduit and used it to punch a hole in the side of the pail leaving about 1/2"
of the rim.
To accomplish this, we clamped a piece of 4" X 4" wood firmly to a workbench and slipped the pail onto it, using the
wood as an anvil.
Then, a few hits on the sharpened pipe (they are called "dinker dies" in the trade) with a framing hammer or bigger,
and Viola!, a hole.
The hole in the pail could be slipped over the spile and would catch on the little hump on the top of the spile.
This worked very well for us.
Earlier in the process, we made those holes by heating one end of the piece of pipe with a torch and pushing the heated
end through where we wanted the hole to be.
This was harder to do and messier, but it had the advantage of leaving a ring of the plastic around the edge of the
hole. We thought this would strengthen the hole but we never had any problems with the pail braking anyway.
The pails we used had a capacity of 4 gallons before modification, But afterwards, with the hole on the side and
hanging at a slight angle on the tree, we figured the capacity was reduced to about 3 gallons. That hardly ever
caused a problem as long as we collected every 24 hours.
Somewhere in January or early February, Rick and I went up to the woods to refurbish the arch (the firepot for the sap pan)
and found it too far gone. So we decided to move to a drier site about 30 feet to the west of the old evaporator, build up
a pad and then build a new evaporator at that location. I had 10 yards of crushed limestone delivered to the foot of the
drive about 300 feet from the potential site of the evaporator. I moved it up to the newly chosen site and spread it out
into a 15 foot square, about 1 foot high.
Rick and Mary and their friends did the tapping, spile driving and pail attaching during the last two weeks of February.
Sheran and I went to Hawaii for our 35th anniversary treat between March 2nd and March 13th. While we were gone the kids
continued the preparation, cutting wood, cleaning equipment and preparing pails and covers.
On the weekend of our return from Hawaii I built the evaporator . It was made from the two trailer tongues from our new house
and from other materials we had around the farm. I welded and cut for two whole days to get it done. I hauled it up to the woods
on a rainy night and Sheran & I horsed it into its approximate location.
We brought an old hay wagon up to the site soon after to support the barrels of sap so we could gravity feed from them to the evaporator
pan. Rick put the evaporator into its final position and leveled it up. Sheran located a free used kitchen stove to use for finishing
the syrup. Rick moved it into the little 6 ft X 10 ft finishing house ( a metal building that had been up in the woods for many years).
We hired Harlan Falde to convert it to propane and to "install" it.
FIREWOOD
Rick, Mary and the kids had cut some wood (about a stove cord) a few months earlier. We had about 2/3 of a stove cord up by the house.
This amount of wood would have made maybe one batch of syrup. The real solution was that Sheran found a source of scrap wood from Oakdale
Products in Spring Valley.
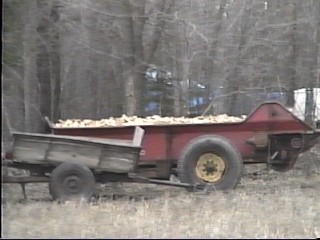
These small (1" X 3" X 2" to 10" ) pieces of kiln dried oak supplied 90+ percent of our wood for the rest of the
season. We employed both of our "wood wagons" to get loads of it. We could get one load every couple of days. We'd bring them
an empty wagon and return home with a full one.
The road up into the woods became a swamp shortly after we got going. This meant , among other things, that we couldn't bring the wood
wagons anywhere near to the evaporator. We had to park the wood wagon down by the road and haul garden carts holding 7 or 8 pails of wood
about 400 feet. We improved on this somewhat when we learned that if we got up very early in the morning we could push (with a tractor) a
loaded wood wagon up along the edge of the field while the ground was still frozen Then we'd only have to lug the wood about 100 feet.
This gets to be a big deal because the evaporator eats two five gallon pails of wood every 10 minutes, and we have to do that for 11
hours to make one batch of syrup from about 150 gallons of sap.
COLLECTING IT
Once the sap began to run, the pails began to fill at the rate of one quart per day in some trees to 3 gallons per day
at others. We began the process by collecting sap in 5 gallon pails from the pails on the trees and pouring it into 55
gallon drums sitting on a pallet loading attachment on the back of our Ford tractor. We placed a large funnel with a
cotton flannel filter into the drum. We would drive the tractor up into the woods, fill the drum, then drive it all
the way down and back it up to the hay wagon.
We would raise the pallet loader which would raise the drum (holding 400 pounds of sap). Then we would push the drum
from the pallet loader onto the hay wagon. This only worked so-so because the pallet was at an uphill angle and the
drum, at 400 pounds, was very hard to slide uphill. We also had trouble because the hay wagon bed had several rotten
boards that gave way from time to time. Also, the hay wagon was not level. More than once, in the process of wrestling
the loaded drum from the tractor into position on the hay wagon, the drum got out of control and did a backward flip
right off the wagon onto the ground, taking me with it. Once this happened, the only way to empty it was to horse the
barrel up onto a couple of cement blocks then empty its contents into pans, a few gallons at a time.
When we did get the barrels properly off-loaded onto the hay wagon, we used garden hose to siphon from the barrel to
the sap pan on the evaporator. Due to the relative height of the pan and the bed of the hay wagon we could only
siphon about 40 gallons out of the drum. It would then be light enough for us to raise up onto a couple of cement
blocks so that the rest of the liquid could be siphoned out.
Late March:
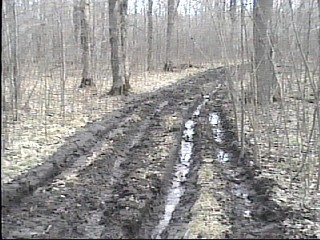
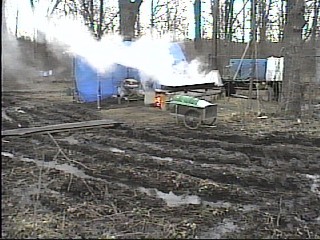
The mud is so deep that the tractor pushes it 50 feet ahead down the tire tracks, which are at least 18 inches deep.
This wouldn't be so bad but the tracks have sunk down almost that far at the hay wagon. This means that the pallet
loader won't go high enough to be level with the hay wagon when we unload a full barrel of sap, making it an even
tougher struggle to get the barrels into siphoning position.
The biggest problem brought on by the mud is that the tractor often rides up on a large root or rock in the bottom of its
tire tracks. When that occurs, the front end of the tractor bounces 3-4 feet in the air! That is a pretty scary situation
made even worse when the sap barrel falls off of its pallet. More than once a barrel landed in the mud or the pallet
with a barrel on it came off the tractor to sit in the middle of the muddy road. Imagine trying to get them back on the
pallet loader!
BOILING IT DOWN
All that aside, to start the process, we'd start siphoning and as soon as we got 5 or 10 gallons of sap into the 50
gallon pan, we would start the fire.
In the past, we used the basic rule that maple syrup boils at 7 degrees higher than water boils to determine when the
sap is ready. This year Rick went to the Roth Sugar Bush in Cadott, Wisconsin , about 80 miles away to get a couple
of hydrometers so we could tell accurately where we are in the process. He came back with a sap hydrometer and a syrup
hydrometer. For bottling, he brought 75 quart jugs, 20 pint "Log Cabin Cans" and 20 half pint cans of the same
nature. We'll use these containers in addition to regular quart canning jars to safely save our "product".
He also brought a set of rubber maple leaf molds for making maple candy.
Anyway, we've now got a lot of high-tech stuff for monitoring the main boiling process as well as helping us out in the
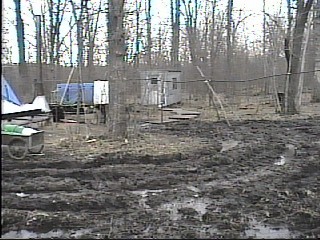
finishing house, which is about 30 feet away from the evaporator. 30 Muddy feet away. We put down some boards to walk on
but they disappeared into the mud. We put down some sheet steel and 5 pallets.
Now it's like finding stepping stones to get over a stream.
There's no electricity at the site. We have one propane Coleman lantern, a number of candle lanterns and some open candles
to illuminate the place at night, which is when we do most of the "cooking".
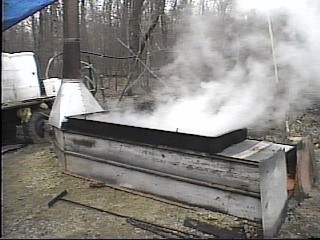
One night I was watching a small batch of sap boiling down and when I needed to test it to see if it was ready to take
off the evaporator, I realized that my candle was almost out. Now, "a small batch" means that we had only
filled
the sap pan once; that means we had put 40-50 gallons into the pan and boiled it down. The pan is 21/2 feet by 6 feet
by 6 inches deep. 50 gallons just fills it. But when 50 gallons is boiled down to about 1 1/2 gallons (almost maple syrup),
that 1 1/2 gallons barely covers the bottom of the big pan. The bottom of the pan isn't perfectly flat either. So the
liquid has to be constantly sloshed around to keep the bottom of the pan from overheating which could ruin the whole
batch in a matter of seconds. Remember, there is a 2 1/2 feet wide by 6 foot long fire ROARING away right under the pan!
Anyway, I ran to the finishing house to get a candle. Sheran handed me one along with a lantern to put it into.
There was a burned out stub in that lantern. I furiously dug it out, plugged in a new candle, and ran back to the
evaporator. TOO LATE! I quickly slid the pan sideways off the fire onto the rails we had provided, but all that was
left was a burnt, gooey mass! It took 1 1/2 hours to clean that mess up and get ready to cook again.
Don't ever try to cook down that small a batch that far! If we boil 140 gallons in 11 hours, that is almost
13 gallons per hour or 0.2 gallons per minute. When I had gotten down to about 1.7 gallons, it was
"syrup" (65% sugar). But waiting 3 minutes too long takes us WAY PAST "syrup", candy and sugar;
all the way to brown-black goop!
FINISHING IT
Now, here's how the finishing process goes: Once the sap has boiled down to "almost syrup" in the evaporator,
we slide the big pan off of the fire onto the rails we've provided so that it stops cooking immediately. One person
positions a 4 gallon canning kettle under one corner of the pan while the other tips the pan to drain it into the kettle.
Then the kettle, with its 200 degree "brew" is carefully carried to the finishing house and put over 2 burners
of the kitchen stove.
The cooking continues, over this much more carefully controlled and less violent fire. A Baume' scale hydrometer is used
to test the syrup, looking for a "perfect" reading of 32 degrees Baume'. When the correct sugar content (65%)
is reached in this way, a "candy boil" occurs. We turn off the heat. Next step is to bottle the syrup.
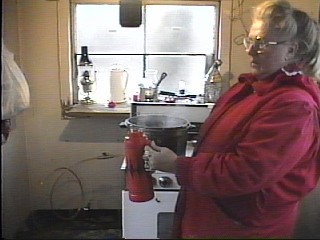
BOTTLING IT
This process is almost identical to that used to can fruits and vegetables. We sterilize all the containers and lids
first. Then we put a large funnel over the top of a 22 cup coffee percolator. We put a clean (new) diaper-flannel filter
in the funnel. We pour the still-hot contents of the finishing kettle through the filter into the percolator.
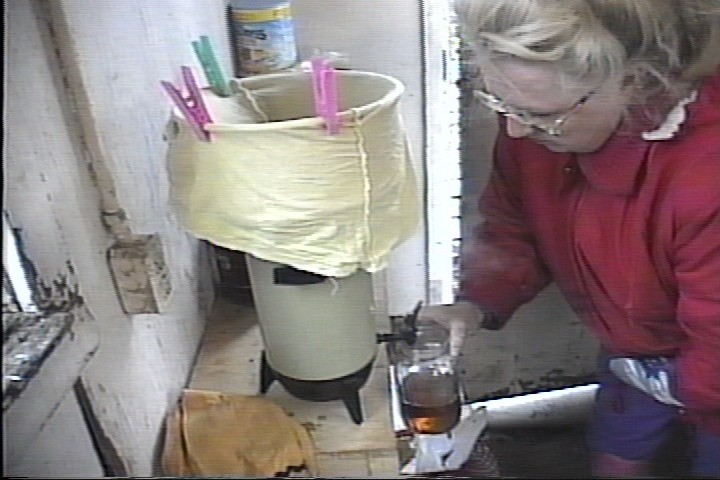
Then we fill the containers through the coffee-pouring spigot in the bottom of the percolator. The cap is put on tightly
and the container is inverted and left to cool. If the seal isn't perfect, the container will leak. This is how we
verify that we've done it correctly.
GOOD & NOT SO GOOD EXPERIENCES
I remember one night, late in the season, about April 10, when we had to cook all night. By that time, Rock had built
an 8 X 10 flat, high and dry platform about 6 feet away from the evaporator with a lean-to to keep out the wind. The
sky was clear and there was a big moon overhead filtering down at us through the tree tops. The fire was making its
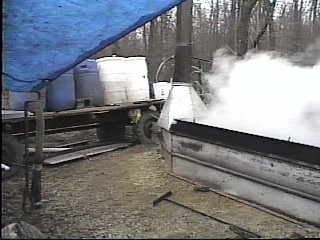
important sounding roar and the pan was in a rolling boil over almost all of its surface. This made clouds of steam
rise up through the trees toward the moon. Otherwise, the night was still. It was a beautiful evening.
One night shortly after this, Sheran and I finished a batch at about 2 am. By that time, the fire had gone down to
just a big bed of glowing coals. Usually we would just let the fire go out and then restart it a day or so later for
the next batch. But instead, we started refilling the pan and then slid it back over the fire. We continued filling
the pan almost to the brim being quite sure that there wasn't enough energy left in the fire to do anything but to
simmer the sap down a few gallons. This was on a Friday night and we were off on a trip the following morning. Rick,
Mary and the girls would come out that day to continue cooking where we left off.
Well, when we got back home we found this big mess in the utility room at home. There were black specks all over the
lower parts of the walls, etc.. and a bunch of sandpaper fragments and other cleaning tools lying around.
---It seems that the fire had not only boiled a little sap, but had totally cooked itself dry! It took Rick and Mary
many hours to get that pan clean!
One day Sheran decided to finish a batch of syrup all by herself, while starting a new batch of sap cooking. Okay,
so Sheran has a batch of last night's almost-done syrup cooking away on the stove in the finishing house. She goes
out to the evaporator, slides the big pan back onto the firebox (no fire yet) and proceeds to start a sap siphon
from the barrels into the pan. You know how this works: you poke one end of a 15' garden hose down into a barrel
then suck on the other end to start the flow. What Sheran didn't know was that there was a tiny leak in the middle
of the hose. So she worked and worked at it but no luck in getting the siphon to begin. The sap would only dribble
out the end of the dose an then quit running. Exasperating! All of a sudden she realized that the syrup was still
cooking away in the finishing house and that she had been away for a long time! By the time she got there, about
2/3 of the syrup had boiled out of the kettle all over the stove, oven, and the floor! What a mess!
A couple of days later came the "Fateful Night" of the hung-up tractor. By now the tire tracks of the tractor
have become so deep that the nose of the tractor plows through the mud under it's belly. That isn't too bad since it
still continues to lumber along anyway. But on this night, as I drove the tractor uphill, the temperature was
dropping through the freezing point. Not unusual; that's exactly what makes the sap run out of the trees.
But as soon as that happened, the mud under the tractor belly stiffened up just enough to stop the tractor completely!
After messing around for half an hour, Sheran and I went home. Rock pulled the tractor free with a come along hooked to a
handy tree. We repeated this whole process once more and after having Rick make one dangerous sortie for another barrel
of sap, we gave up on the tractor completely as a sap-hauler.
But the season wasn't over yet!
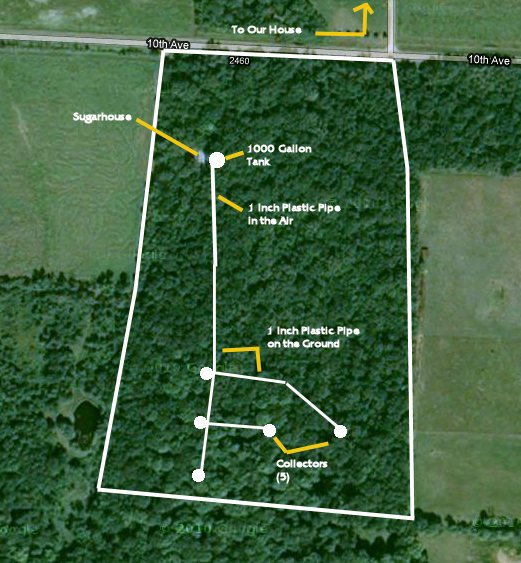
THE PIPELINE
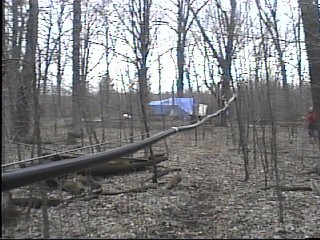
Following an idea we saw at Kiefer's sugar bush, I blazed a 300 foot trail straight through the woods from the evaporator
to the maple trees to the south. The ground slopes upward 8' 10" over that 300 feet. This point is 400 feet North of
a more or less center point of the sugar bush itself. And from this 300' south point the ground slopes gently and
continuously upward another 20 vertical feet or so. Next, I strung a 300' piece of 3/16" aircraft cable from
ground level at the 300' point to a big basswood tree and tied it off at 8' 10" above the ground within about
30 feet of the evaporator. Next we borrowed a plastic 30 gallon container with an outlet in its side close to the
bottom. This I mounted on a wooden base at the central point up in the sugar bush. Then I ran 700' of 1" plastic
tubing from the evaporator area up to the collector-drum, hanging the 300 foot portion onto the aircraft cable with good
old 3M pressure sensitive fiberglass tape.
With this setup, we simply poke one end of the 1" pipe in an empty drum on the hay wagon. Up in the sugar bush we
use the snap-ring on the drum-collector to hold a muslin filter in place over its mouth. Now we simply collect sap as
usual, but instead of the tractor and barrel we simply dump the sap into the collector. Gravity does the rest! Wow;
what an improvement!
1995 SEASON EPILOGUE
Finally, just about the time we got the process working smoothly, the weather warmed up and the sap quit running.
This year that happened just before Easter weekend.
It's now September 12th, 1995 as I look back on all that activity. We boiled down about 900 gallons of sap from 150
taps in about 100 trees. We made 30 gallons of maple syrup, but only got about 26 gallons or so bottled after spoiling
some as mentioned earlier. The folks in our area told us that this year was only about 1/3 of a normal "run",
so maybe we'd have gotten 80 or 90 gallons of syrup some other year. We split the syrup evenly between Rick and us.
After taking a month or two to recover from our ordeal we began to plan for next year. So far we plan to expand from 150
to 200 taps. We'll put 4 or 5 collecting stations up in the sugar bush instead of the tractor/barrels or the single
collecting station we used this time. that change should make the collecting process 2 or 3 times easier and much
less hazardous. We'll eliminate the 55 gallon drums all together and install one 1000 gallon tank down by the
evaporator.
We plan to build a real sugar house. And we put in a full year's supply of wood already this fall. We built a 17'
diameter snow fence "corn crib" on a sand lifted area within 10 feet of the sugar house site to hold it.
We have already built about 400' of permanent road up to the site so we can drive right up to the place anytime during
the season. We cleared an area big enough for our 20 X 24 foot sugar house and carved out a 150' waterway to the high
side (the south) so that no ground water can run onto the area.
The next big hurdle is to figure out where the money will come from to complete the building program. Today we got
an estimate for a bare-bone building with NO sides or cupola (we'd do the finishing of the that later).
The estimate was $3200. No Way!
The absolute "Have to's" (things that have to be done before the ground freezes:
Get the 16 building poles set in the ground
Get the 4 poles needed to support the 1000 gallon tank in the ground
Sink 3 posts in the ground to better support the flying part of the pipeline
Get the crushed limestone spread on the new roadbed and in the sugar house.
December 28, 1995:
The sugar house is up and out of the ground and is basically roofed.
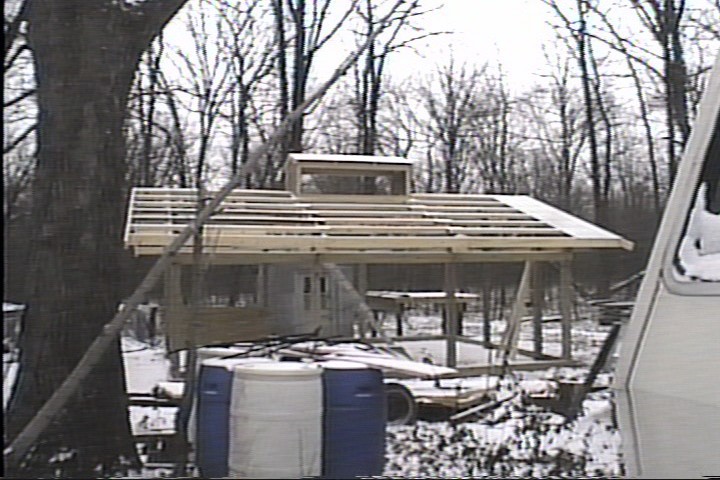
The stand for the 1000 gallon tank is complete.
Cleaning the 1000 Gallon Maple Sap Tank
The west and North sides are ready to side with used steel. The windows have been purchased.
The road is completely surfaced.
We even added enough width for a turn-around. All needed materials are on-site. Our motorhome is parked up at the site,
providing warmth for workers and their "support staff" and providing up to 4.5 KVA of electricity for the
skilsaw etc..
Here are two satelite views of our operation to help you understand how everything fits together:
This first shot encompasses about 22 acres and shows the relationship between the collecting stations and the
sugarhouse.
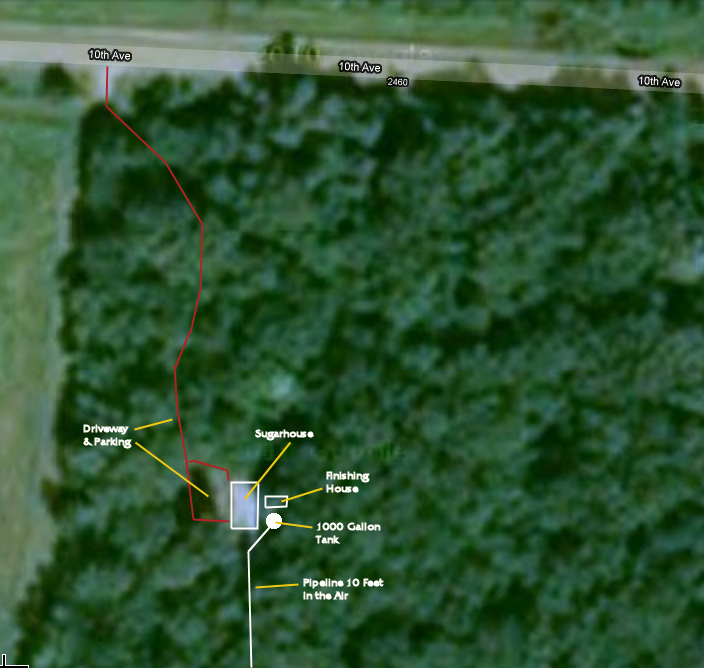
The second picture shows the sugarhouse area in a little more detail:
September, 1997:
We have switched over from wood scraps to wood cut and split on our own place. We have had to rebuild the grate system in
the evaporator to handle this kind of wood. In so doing we have increased the evaporation rate from 12-15 gallons per
hour up to 18-20 GPH. We got tired of digging the scrap wood out from under the tarp, especially on nights when it
was raining, so we added a roof 20 feet in length on to the basic 20X24 Sugarhouse. This extra covered area is for
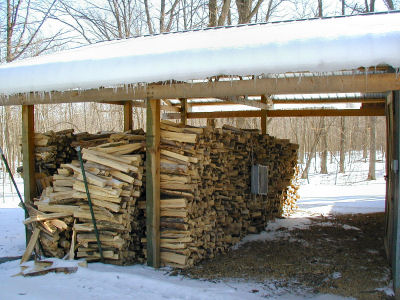
wood storage.
What an improvement!! This is a one year supply of "Sugar Wood"; enough to produce about 60 gallons of syrup.
Improvements to the Finishing House
We built a new floor under the finishing house. We added a shelf that holds 2 150,000 BTU burners to heat up the syrup
for what we call "bulk bottling". Here we store up several runs of syrup and then heat and bottle it all
into special 5 gallon containers. We store those containers at home in the basement until we decide what size
"retail" containers to bottle into.
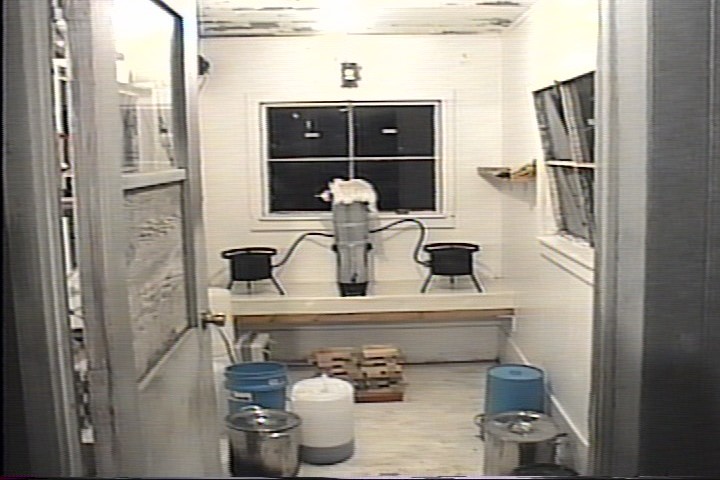
We have also upgraded our "Bulk Bottling" system with a new support for the filters. The filters are now
commercial syrup filters. We use a 50 micron Orlon outer filter and a matching paper filter inside of that.
You can see that machine in between the two big burners on the shelf in the picture above.
1998 to 2002:
We have continued to make minor improvements to the whole system. We have stabilized our sugarbush at 240 taps.
We bought a 10 gallon commercial bottling unit that makes bottling go much faster. We have continued to upgrade the
evaporator, completely firebricking the whole firebox. In 2002 we added a 5th collector to minimize steps in
collecting sap. We have developed a set of 5 important METRICS that we measure continuously
to keep quality high and to keep the evaporation rate at maximum.
2003 to 2005:
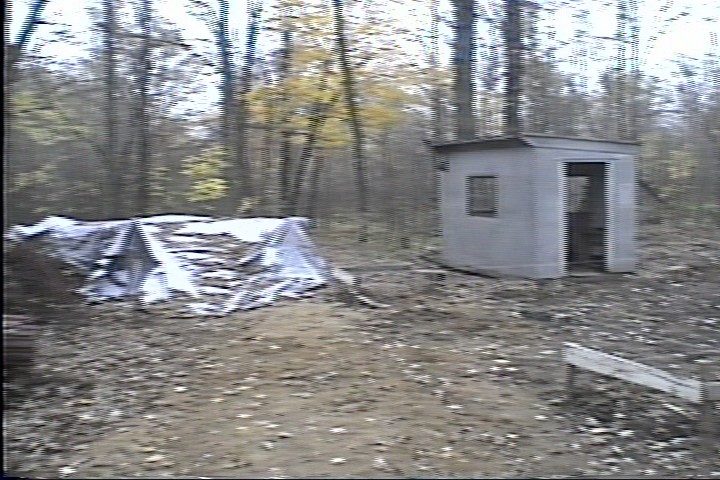
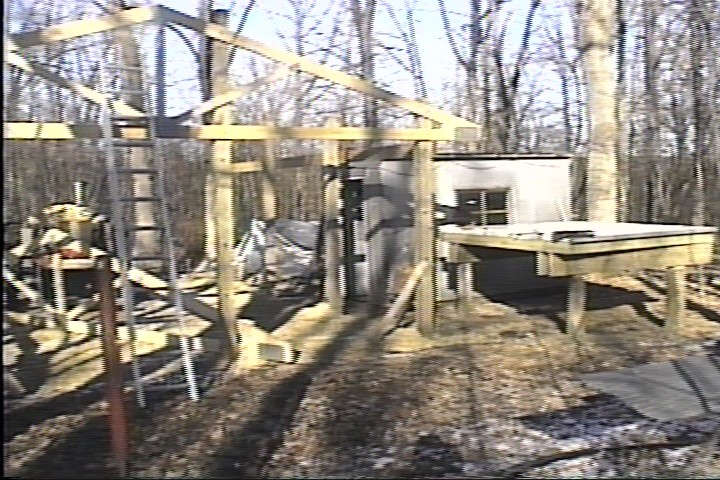
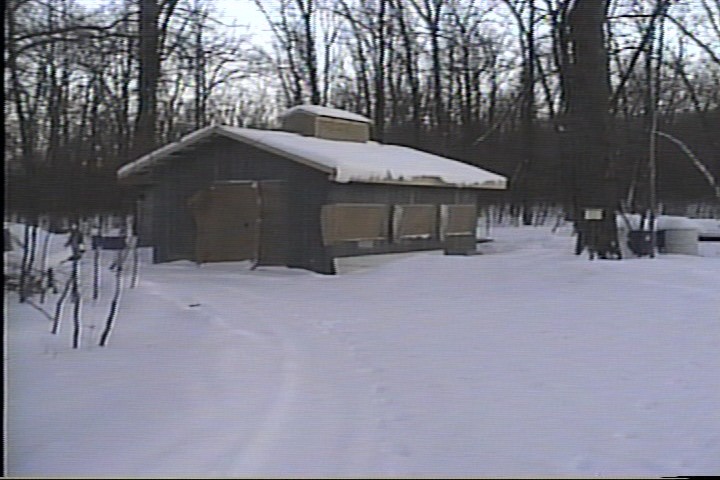
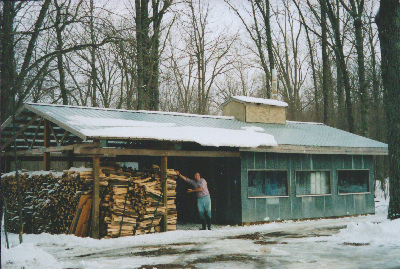
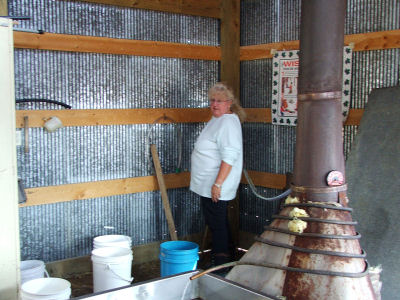
Here's a pictoral summary of our operation.
Two views of our Sugar shack. The left picture shows the west side and the wood storage area.
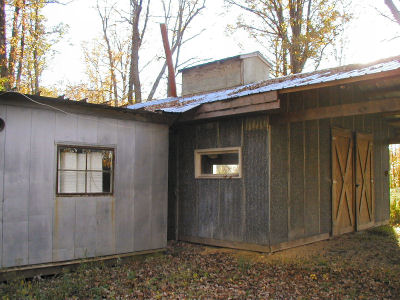
The right hand picture shows the east side of the sugar shack with the Finshing House and the 1000 gallon storage
tank.
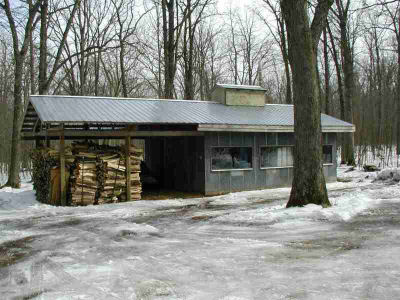
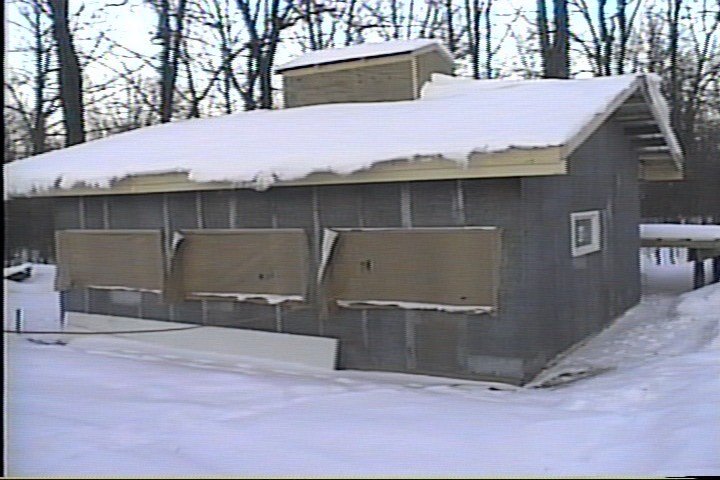
Here's a close up of the east side of the Sugar Shack, showing how the Finishing House is closely coupled to the
Main Sugar House. This way, we don't get wet when we move from one building to the other if it's raining.
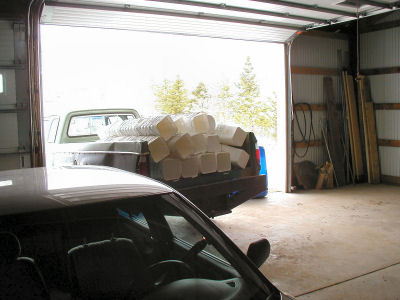
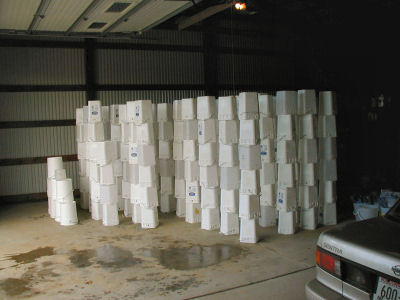
Cleaning Pails:
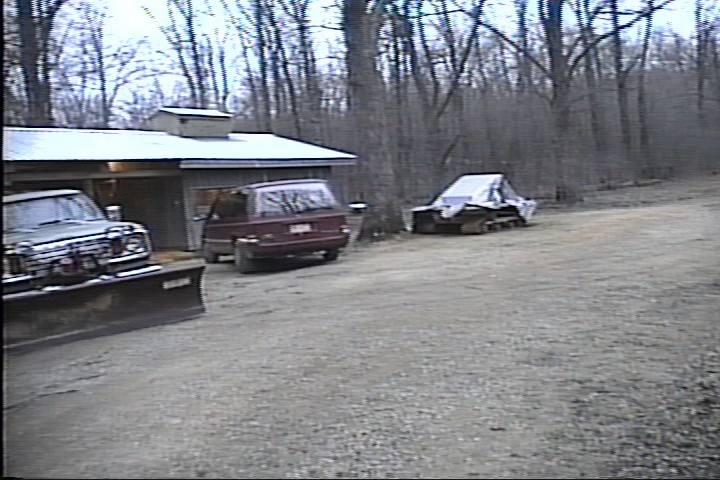
The left picture shows a load of pails coming to the garage to be cleaned and rinsed.
The right hand picture shows the pails all cleaned up and stacked to dry before being stored in the finishing house.
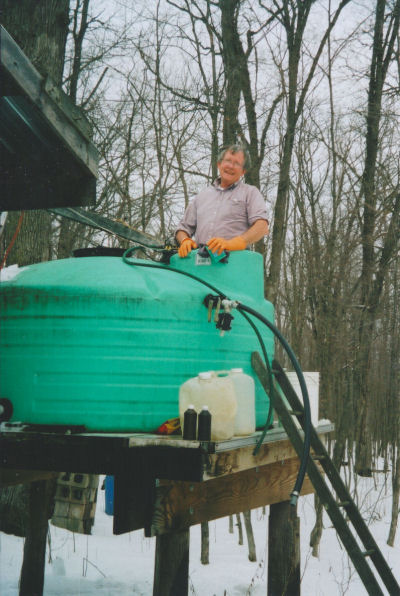
Here's me standing in the 1000 gallon tank, again. I am smiling because I just got done cleaning it.
I have to get completely into the tank, where I sit on a 5 gallon pail while scrubbing the top and then kneel while
scrubbing the sides and the bottom.
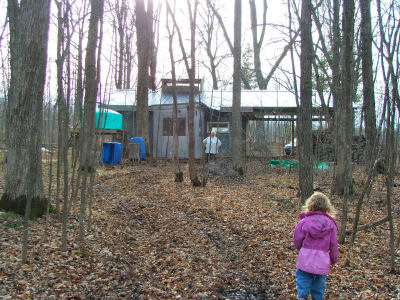
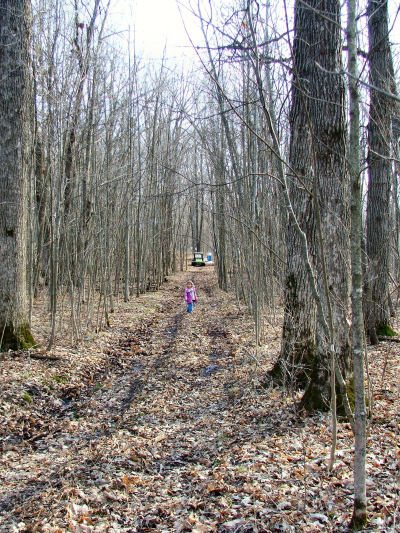
Here are two views of the trail going south and uphill to the Maple trees. The Cushman Trackster is parked
beside the lowermost collecting station.

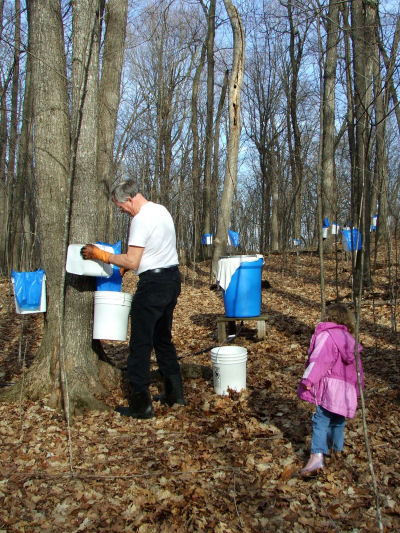
The picture on the left shows how we cover our pails to keep water, bugs and debris out of the sap. Many of you
will recognize the plastic bags as being the same bags that are used with the metal pouring frame, which hangs right
from the tree.
But we cut a hole in one side of the bag and stretch it over the pail, instead. This way we can hold a lot more sap
than the bag alone can. This is important on days where we may get a 3 to 4 gallon run!
The right hand picture shows me pouring sap from the "tree" pail into a 5 gallon pail. Note that I don't
have to take the pail off the tree! I simply pivot the pail on the spile, while the folded-over, open end of the plastic
bag acts as a spout.
By the way, you can see that I am dressed in only a tee shirt. Many of these pictures were taken at the END of the
season. They don't show us wading through snow and ice that is 2 feet deep, or collecting when it has been below
freezing when we have to dump big chunks of ice out of each pail.

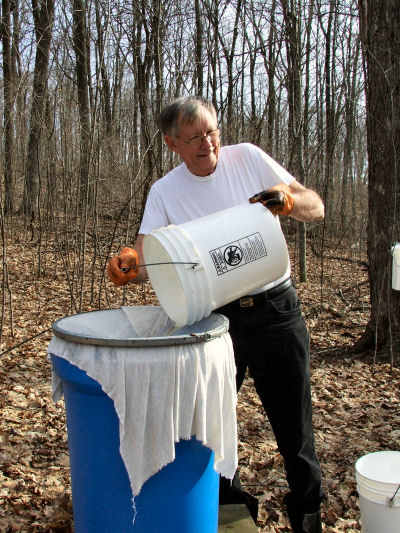
Here, I am emptying a pail of sap into one of our five collecting stations. The muslin cover keeps out bugs and
debris.
As you have seen earlier in this webpage, these collectors all feed a pipeline that runs directly into our 1000
gallon tank.
Once we have enough sap in the 1000 gallon tank to make a "run", we start filling the sap pan.
The sap runs through a 25 foot length of copper tubing that is wrapped around the evaporator's plenum and then into
the pan. This tubing preheats the sap by about 26 degrees F before it gets to the pan.
In the right hand picture, Sheran has just finished checking the depth of the sap. We want a sap depth of between
one and one and a half inches before we light the fire.
Just a reminder: This is a one-season supply of wood. For this season, a lot of it was fresh cut, so we mounted a
window fan as you see it and ran it for several months to help dry the wood.
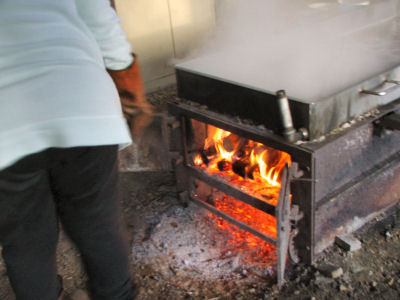
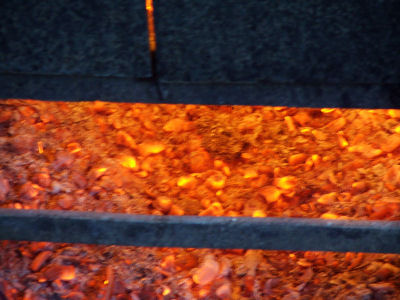
This is a good, hot fire, the kind that will get us a stack temperature in the 650 degree F range. We add about 20 pounds
of wood every 6 minutes when we are boiling sap. We even use a kitchen timer, so we don't "loose" the fire.
The right hand picture shows the coals that have fallen through the grates. It's too bad that most of that energy
doesn't go into boiling the sap, but if the coals pile up on the grate to much, they choke the flow of air to the
wood.
As they say in syrup making circles: "it's the flames that boil the sap, not the coals!".
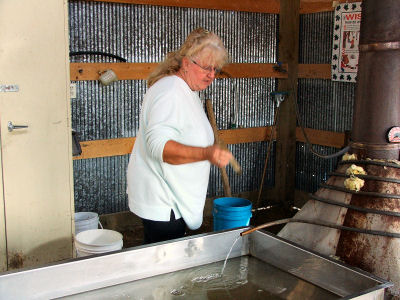
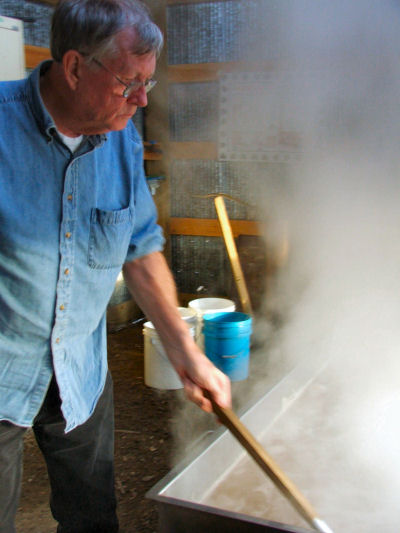
Here, I am skimming the froth from the sap. This is a constant job.
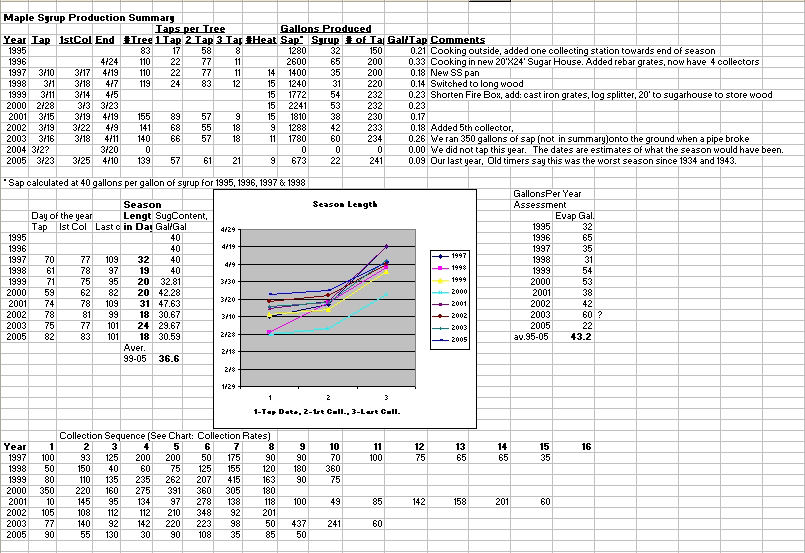
Finally, the end of our little "Pictoral", the DATA!!!!.
There's a lot of info crammed into this one spreadsheet, and it's probably only of value to those who are actually
planning to make their own syrup. So, if you are one of those, and you have any questions about this information,
feel free to contact us.
2006:
This is our last year for making maple syrup, for now anyway. We are still around, but its a LOT of work, so we have
decided to take a few years off. The equipment has all been put away clean, so all we'd need to do is to clean it all
up and start again.
Ever since we have had our 4 or 5 collecting stations up in the woods, we have had to uncover, repair as needed and
clean those lines every spring. I think there is about 1000 feet of 1" tubing up there now, servicing the 5
collecting stations. About 750 feet of that is laying on the forest floor and is covered by leaves, branches and
up to 3 feet of snow by the end of February. It all has to be cleaned off so it'll thaw and allow sap to run.
We clean thus tubing by pushing cleaning solution (hydrogen peroxide and water) UP the hill, let it stand for a while,
then let it down and drain it out. Then we wash the lines 3 times with plain water.
To do the pushing, I made a syphon tube that goes to the bottom of a 55 gallon plastic drum. The drum is filled with
solution and then compressed air is pumped into the drum to push the solution up hill all the way to the topmost
collector. This takes about 17 psi for the height that we have to get to for the highest collector.
Just at the end of this cleaining process this year, I got impatient that the solution wasn't moving fast enough and
connected an air tank the had 125 psi in it with no regulator. I opened the valve a little, but forgot about it for a
few minutes. BAD IDEA!!! All of a sudden "KABOOM!" The drum split about exactly at its middle and the top
half flew about 100 feet into the air, landing in the snow a couple hundred feet away. The tubing from the collectors
had broken loose from the drum fitting and was snaking wildly through the air, soaking me over and over with the fluid
draining back out of the line! What a mess. Maybe that helped to make the decision to stop for a while.
When people ask us what an average year is like, we tell them that there is no "average" year! Every one is
different and unique.
 1996,----We built this neat Sugar House
 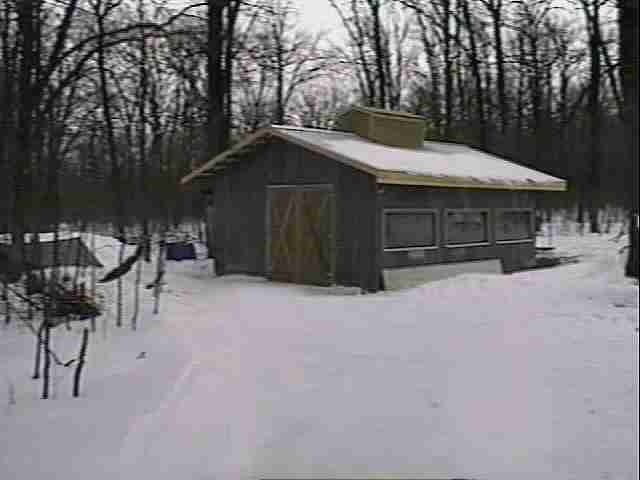 1998,-We added covered wood storage
 Go to Rick's Vintage trackster Website