Thermocouple Calibration for Wood Gasifier
Created: February 20, 2010
Last Revised: April 20, 2020
French Creek Valley Home
Back to Woodgas
My Blacksmithing Section
Contact Us
I have corralled a lot of Type K thermocouple wire over many years and have purchased several sheathed Type K
thermocouples on the internet over the last year. During 2012, I built an Arduino based datalogger which makes
it easy to read, record and graph their values as I experiment with woodgas to fuel a generator set. So far I've learned a lot
about my Chinese JXQ-10 gasifier, Onan generators and making them work together.
But, I still get results that I don't fully understand and with advice from others decided to calibrate ALL of my
thermocouples to make sure they were not contributing to conflicting data.
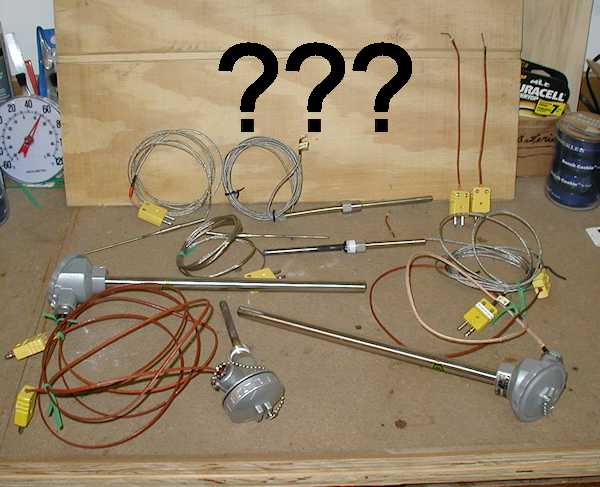
I have a dozen or so open 20 gage T/C's that I welded myself, 14 gage beaded T/C's (with analog meter) that I bought years ago, 4", 5", 6"
and even
some 12" sheathed T/C's that I have gotten in the last year. The sheathed T/C's have sheaths as small in diameter as 1/8" and
as large in diameter as 5/8".
My major concerns are with my more recent purchases (usually from China or of Chinese origin, I think).
The wire colors often don't correspond to the "Type K" standard that I have
always known, ie: Yellow is Chromal (positive) and Red is Alumel (negative). Those "new" vendors also use crimp connectors whose
colors don't fit any standard for T/C's, but they do seem to use Red for the positive lead.
I was worried that they may have sent my Type N or even type J T/C's.
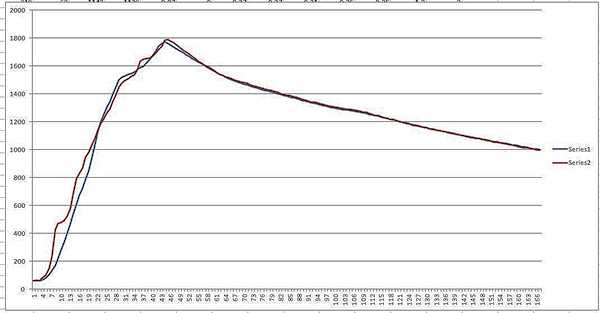
For my gasifier, I don't need laboratory grade accuracy, but I do need to be within +/- 30 degrees F or so. This means that
I don't have to buy expensive calibrated T/C's. What I did do is to measure several of my more trusted early T/C purchases
against each other and against my home-welded T/C's. In all cases they tracked very closely, within 10 or 15 degrees F of each other
at about 1800 degrees F. From this result, I concluded that if I tested each of my newer sheathed purchases against my
own "standards" I'd have reliable test results. See example graph below.
My oven is made from 1" thick pieces of high temp (2500 degrees F, I think),8 pound density Kaowool or Durablanket.
It is about 4 1/2" high and 4 1/2" wide, by about 9 inches long. Since the Kaowool is one inch thick, this makes the
cavity to be about 1 1/2 high X 2 1/2 wide by about 5 inches deep.
For my first oven, I
simply placed a 1" thick, 4 inch wide and 9 inch long high temp firebrick on a convenient stool close to my datalogger
and placed 5 pieces of the Kaowool on it
forming a 5 sided box, with the front side open. I poked small holes in the backside piece, just big enough to push the T/C's
under test about 4 inches deep into the open space. I slid a 2 inch length of 3/4" water pipe over both of the T/C's
to keep them close together. I also placed a one inch square chunk of half inch thick steel in there to add a little more mass.

Then, after connecting the T/C's to my datalogger and turning it on, I proceeded to heat up the inside of my little oven,
attempting to balance the heat between the two T/C's. As I did this, I also worked to heat the pipe and the chunk of steel.
Once I got the pipe and the the steel up to a good medium orange color (about 1800 degrees F), I turned off the torch and
covered the entrance with another piece of kaowool.
This allowed the heat from the mass of the pipe and the chunk of steel to soak the T/C's and even out the temperature
throughout the oven, but particularly the area within the piece of pipe.
You'd be surprised at how little heat exits from this simple oven once the front cover is in place.
The whole heating process only takes 4 minutes or less. I usually allow the system to cool down to a little over the
current ambient temperature.
before I stop recording data and remove the T/C's under test. The insulation is so good that this cool down cycle
takes about 25 minutes.
I tested most of my T/C's that way, even though the oven was pretty shaky since the pieces of Kaowool were only held
together by friction.
Just recently I bought some more T/C's and figured that I had better calibrate them too. So I took the time to bend
up a simple tin box to contain the whole thing.
Here is is:
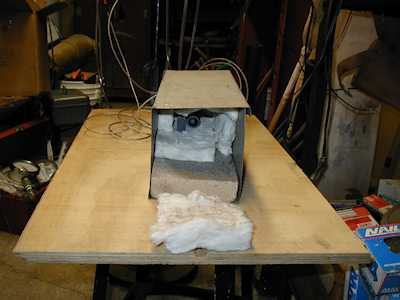
Front and side views of the Thermocouple Calibration Oven, Cold.
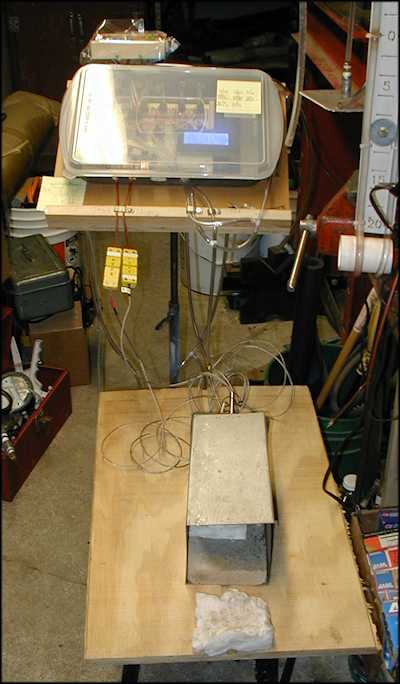
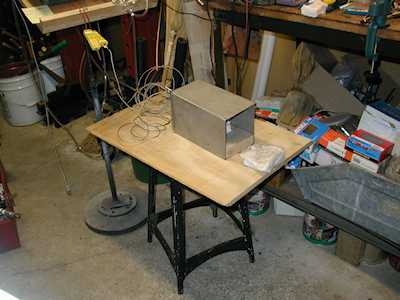
Here's the whole setup, ready to heat up. The front door is the piece of Kaowool in front of the brick.
The Calibration Process
These four images show the Calibration Oven in various stages:
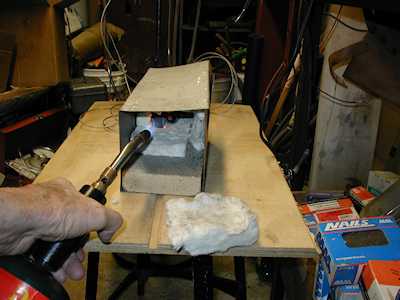

Begin Heating the Oven
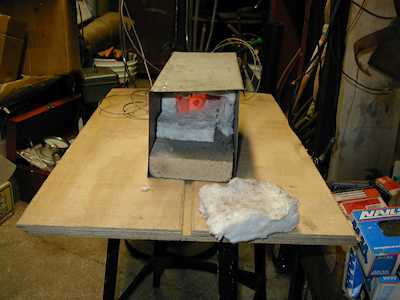
Oven at full temperature. About 1800 or 1900 Degrees F is good enough for me
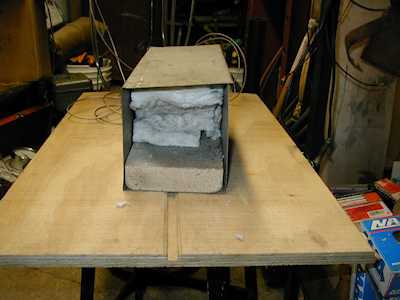
Ready to Close the Oven
Door Closed, T/C's Soaking During Cool Down
Here below, you can see the datalogger's output during the heating and cool-down process.
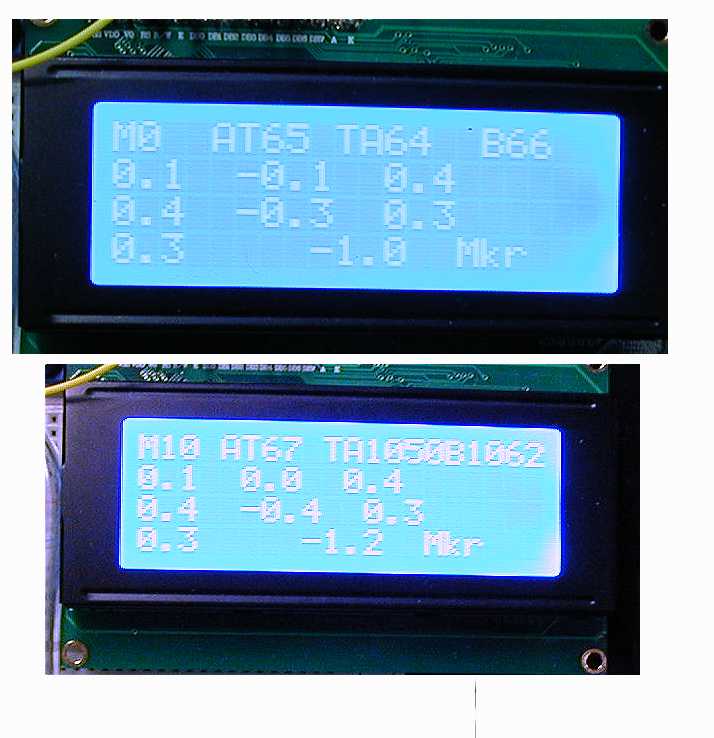
The top row of the LCD readout is the only important one here. The "M" on the left is the number of minutes since the test began.
The next 3 entries are temperatures. (All temps are in degrees F.)
"AT" stands for ambient temperature. You can see that we started with the room temperature at 65 degrees in the upper picture
and were at 67 degrees 10 minutes later.
Hope it's not too hard to read---- I had to squeeze things on the LCD display to have room for the the "TA" (first thermocouple and
the "B" (second thermocouple) readings to be able to display temperatures to 4 digits.
You can see that the two thermocouples read within 2 degrees of each other when the test started and within one degree of the
ambient temperature at that moment. I am very happy with that!
After I had heated the Oven up to the point where the chunk of metal to the left of the pipe was glowing bright orange and
at least one T/C was somewhat above 1800 degrees, I closed the front door. A few minutes later I noted the readings you see
in the second image.
As you can see, "TA" read 1050 degrees F and "B" read 1062 degress F. That is plenty close for what I want to do.
Some Important Closing Notes:
1. If you intend to use Type K thermocouples like the ones I have discussed above, and you are, like me prone to try the
less expensive route using Ebay or Amazon, etc., you need to carefully read and understand the descriptions. Of particular
importance is the maximum temperature rating for the sheathed thermocouples. Many of the item advertisements say that the
T/C IS Type K, but they say that the maximum temperature is only 400 degrees C. I believe that the limiting factor there
is the type of wire insulation used for the portion of the thermocouple inside the sheath. It may also relate to the type
of material from which the sheath is made.
So, if you intend to read temperature over 400 degrees C, you need to make sure the T/C you buy is rated for that service.
A maximum rating of 1250 degrees C is often applied to the higher temperature sensors. In my experience, the vendors
sometimes DO have this information as part of the description. but sometimes not. I have used the Ebay "ask vendor a
question" box several times to get this important information since I almost always need to measure temperatures in the
500 degree F to 2200 degree F range. (sorry about that, I still do most of my work in degrees Fahrenheit).
2. The outside of the tin oven box never got hotter than 132 degrees F.
3.
If you are interested in the code I use to run my datalogger, I have assembled four directories into one zipped file:
Datalogger Zipped Files
The Max6675 thermocouple amplifier was recently replaced by the Max31855 and I have both versions. Even though my
present datalogger is using only the Max6675's I know that I will soon have to add more temperature sensors, so I got
some Max 31855's. The first two directories below deal only with the Max6675, but the 3rd and 4th deal with a mix of
the Max6675 and the Max31855. There you can see how they can work together within the same program.
DataloggerT
This directory contains the complete program (DataloggerT.ino) that currently runs the datalogger you see in
pictures here on this page.
LibrariesNeededForDatalogger5312013
This directory holds all the libraries needed to run DataloggerT
Max31855ForTC3AndMax6675ForTc1AndTC2
Here, in this directory, is a program I wrote to verify that the Max31855 and the Max6675 can play together.
This version displays readings to the serial monitor. They DO work together.
librariesNeededForMax31855AndMax6675Example
Directory with the libraries needed for the above program
DataloggerT is a pretty long and messy file. Sorry about that, but it works just fine for me. Remember, both of
these programs run on the AtMega2560.
Please feel free to contact me if you have any questions or comments.