Anvils Made From Sections of Railroad Rail
Updated: August 4, 2024
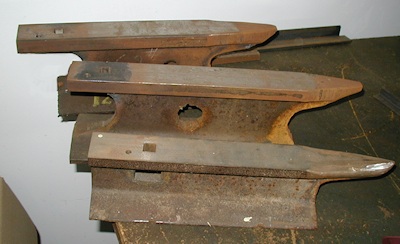
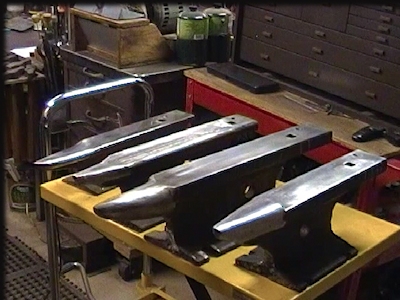
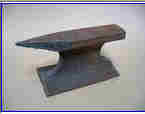
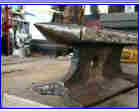
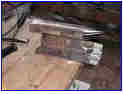
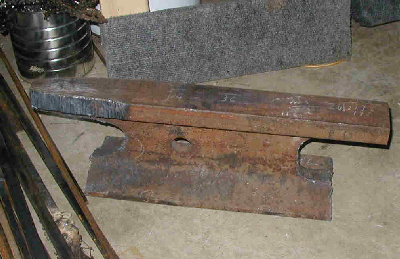
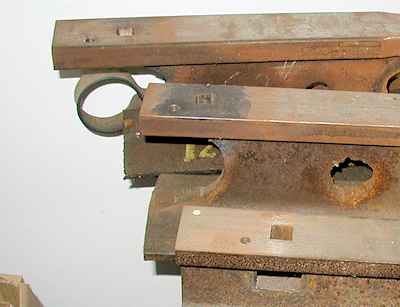
My first three Rail Anvils 4 of the 6 Rail Anvils I have made so far, Click Here for specs
I make rail anvils to show that you don't need a huge investment to get started in blacksmithing.
Not much has been written about railroad rail anvils, but many folks have made them. Some think they are okay and others
don't think much of them at all. In this article, I am taking the positive approach about anvils made from sections
of railroad rail, so if you don't want to hear positive things about them or ideas on how to make them, don't read any
farther.
-Just start asking everybody you come in contact with if they have a chunk laying around of if they know anyone who might have a piece
that you could get/buy/beg, etc.
-Go to just about any local (to your area) fabrication shop, welding shop or general repair shop. Present yourself in a humble manner
and ask if anybody there might know where to get a piece of railroad rail.
-It won't take very long before you make a contact. I think you will be surprised at how many people who are in the metal trades have
a chunk or two laying around.
-Contact local scrap metal yards, too.
-Not all "Rail" is railroad rail. Many overhead cranes, etc. run on rails.
-I do know that some people have had luck directly asking rail repair crews for a chunk. You need to know, however, that rail is not normally
supposed to be "sold" out of the rail/metal recycling industry without proper paperwork.
-Try to get at least 20 inches of rail.
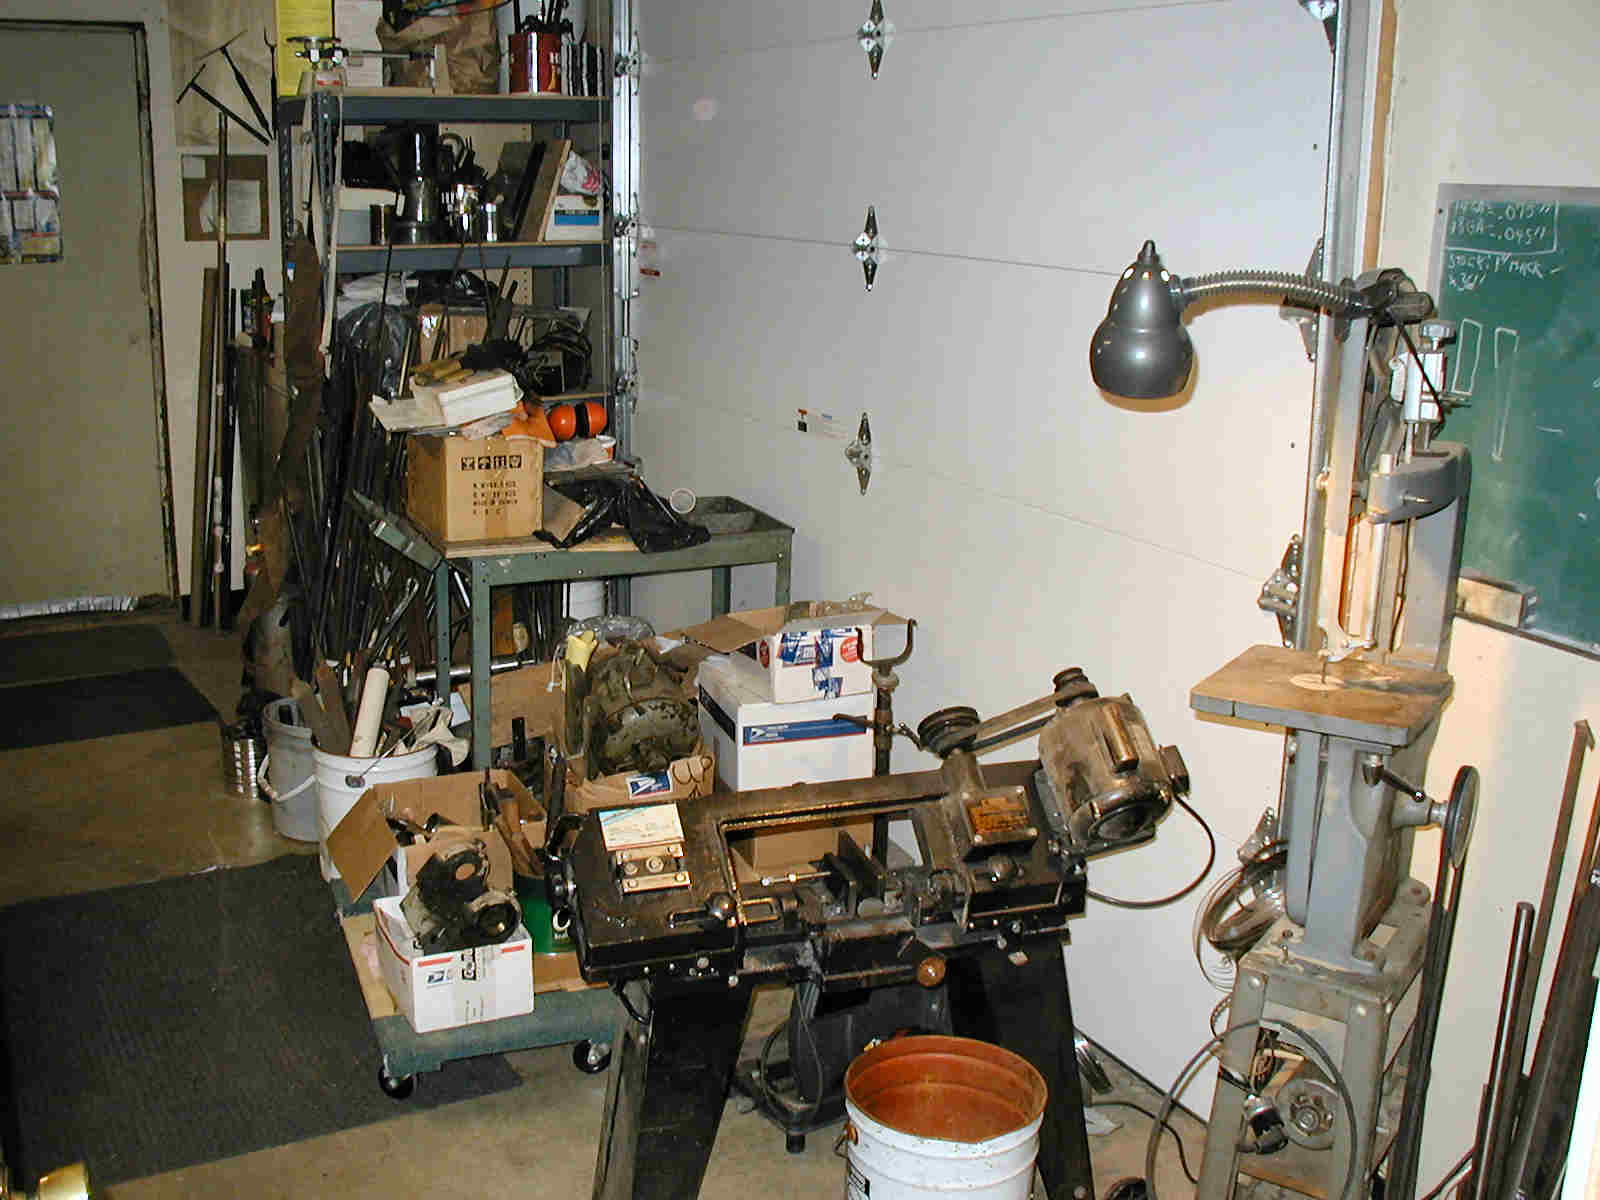
I have cut many pieces of rail to length with a band saw like this one:
My 4 X 6 Horizontal/Vertical Bandsaw
(The black one)
The rail is pretty tough, so I get about 6 cuts with one high quality bandsaw blade before it goes dull.
I have also used an oxy-acetylene cutting torch to cut to length and to roughly shape the rail in the past.
A few years ago I got a 50 amp plasma cutter that can also cut pretty big rail.
-Once you find your rail, decide what shape or design you want and mark it in chalk on the rail.
If you have a cutting torch, cut out the shape. If not, simply take the marked rail to a welding shop and pay them to do the flame
or plasma cutting to shape for you. It shouldn't take more than 20 minutes or so of actual cutting.
If you want to get an idea of how the flame cutting process works, I recently put up a youtube video showing how easy it is to get it done
at a welding shop:
Youtube Video of Rail Anvil Being Roughed Out
-Then, it's on to the grinder, with a good eye shield and ear plugs.
I know that some people have done all the grinding with a 4 1/2" angle grinder, but I'd recommend a 7" at least for the heavy work.
You will notice that the edges of the track section are rounded. Some of this rounding is from manufacture, but a lot of it is probably from wear.
You don't need to grind off all of the rounding. But as you remove more and more of the rounding, you will produce a wider and wider face. Your choice.
-You could get the face milled or ground at a machine shop, but you can do a serviceable job with a hand held grinder, a framing square and some felt tip markers
to get the face flattened.
-You don't have to have a hardy hole to get started; instead you can clamp the hardy tools into a vise, which is another staple tool you'll
eventually need anyway.
-I suggest not grinding a "step" on the horn, because removing that much metal could unnecessarily weaken the horn.
-Beware that the railroads frown on simply picking up stuff you might see along the rail lines. They can tend to procecute agressively.
Lastly, you don't need a lot of fancy equipment to do good work. About 30 years ago, I remember marvelling at the high quality work being turned out
by a group of Hmong immigrants working on a garage floor with one claw hammer,
wet rags to hold the hot work instead of tongs, and a broken Caterpillar crawler casting for an anvil. Their forge was a 2X6 wooden frame with a
"redi-crete" cast
firepot. The bellows was a hollow log with chicken feathers for a piston and the tuyere was simple river clay.
I did some looking around on the web for design ideas, but I didn't find very much information.
I do know that railroad rail is sized by the weight in pounds per yard of length.
A Guild of Metalsmiths member who worked on the railroad for 40-some years tells me that the biggest rail in
America is (I think he said) 141#/yard. He said that rail goes up to 150# plus/yard in Europe.
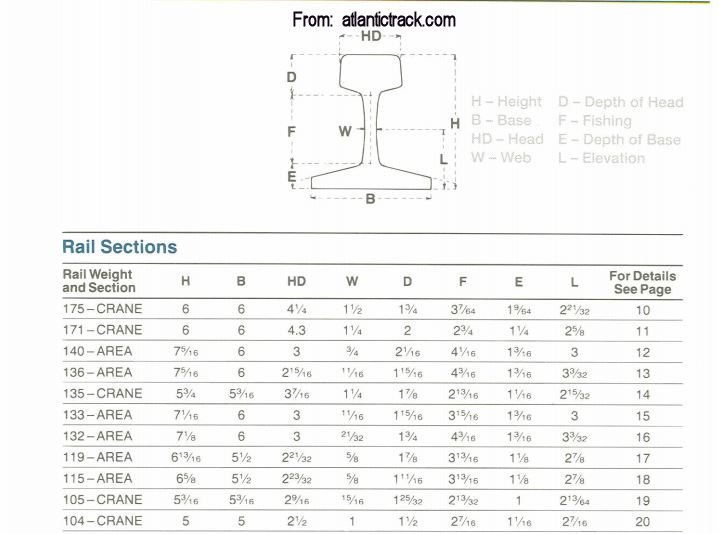
Just recently I learned that Gantry Crane rail comes in even larger sizes than does railroad rail! Up to 175 pounds per yard!
Here's a partial table of Gantry Crane Rail sizes:
---Back to Railroad Rail---
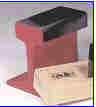
Eau Claire, Wisconsin blacksmith Monte Bygd told me that he used to make them and sell them for $35. His were about a foot long, with no hardy or
pritchel hole. I think it would weigh about 15 or 18 pounds. It looks to be made from about 70# rail. He flame
cuts the horn out and grinds it to shape.
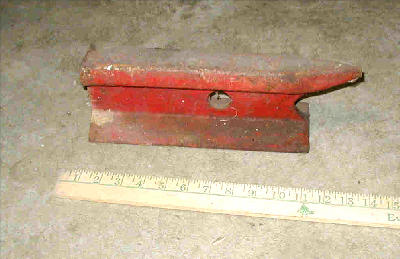
Another Guild member runs a beginning blacksmith tool making project course in Minneapolis Minnesota. As part of the course, each student receives a rail anvil, along with other tooling that they make, as part of the project. This anvil is about a foot long. It looks to be made from about 110# rail. They have a machine shop at the institution where the face is milled flat to some degree and that's it. No horn at all. No hardy hole or pritchel. You can still see the wear on the inside of the rail's ball and the burr on the outside. They sell it for $40 as part of the class. I think this anvil might weigh 25#.
I have been saving up pieces of rail for some years for this purpose. In about the year 2000, I cut up a 12 ft length of 74# rail
into 6 ea. 20" sections.
I have many other pieces of railroad rail laying around now, that are just waiting for me to get at them,
And I have finally found some 136# rail and mostly finished an anvil from that material.
Even more recently, I got enough 141# rail to produce at least 2 more rail anvils.
Finally (September, 2017) had a commercial welder (my oldest son) flame cut them to shape.
The best inputs I have so far for rail anvil designs are from Alexander G. Weyger's "The Modern Blacksmith" book (copyright 1974)
and the
Bernhard Heer/David Harries book "Basic Blacksmithing" (copyright 1993).
A year or two ago, I flame cut out one anvil to the Heer/Harries design and one to the Weyger's design.
The Heer anvil is 74#/yard rail X 20" and the Weygers design is 108#/yard rail X 21".
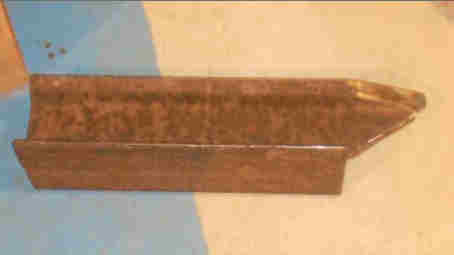
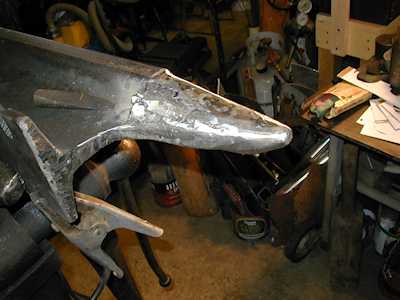
The Weyger's Design, Flame Cut to Rough Shape. It weighs 48 pounds at this point.
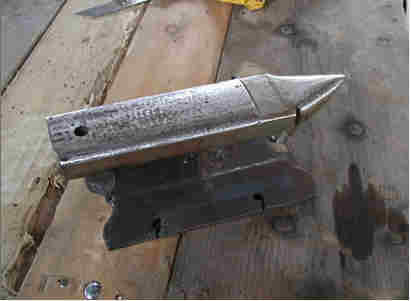
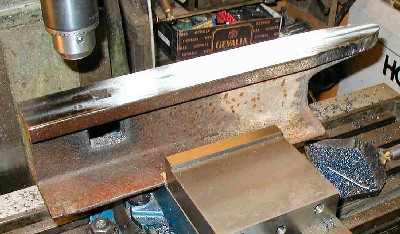
So far, I have been working mostly on the Heer design, and here are three pictures of it as it progresses:
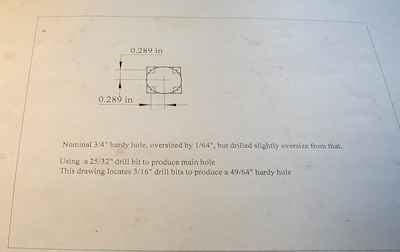
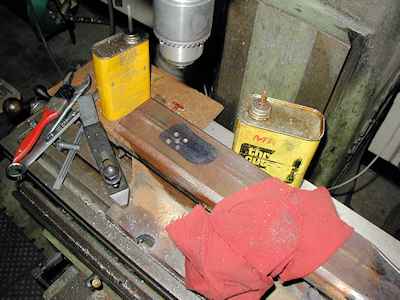
The shape has been flame cut, the face has been milled and the hardy hole has been drilled and filed. I had no
trouble milling the face. Drilling the holes for the hardy hole was okay until I reached the exiting end of the hole.
The cast part of the rail that had not been machined was very hard, probably due to the flame cutting, and it dulled a couple of drill bits.
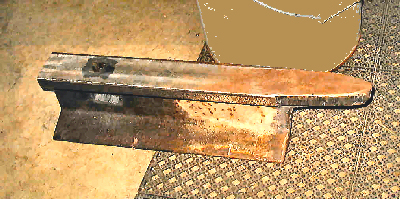
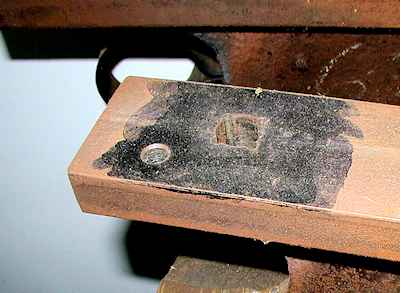
Here the Pritchel hole has been drilled. Same problem with tough drilling as the bit exited the hole, but I did get the
job done.
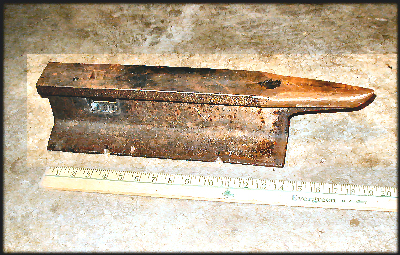
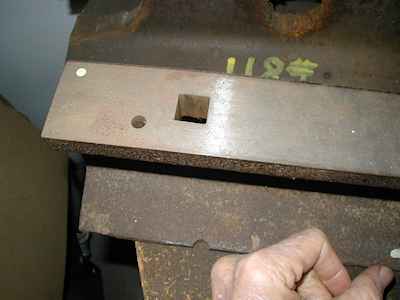
If you look carefully, you can see that I have spent some time grinding the horn to rough shape. I haven't yet decided
whether to fill in the underside of the horn with weld or not. It weighs 29 pounds at this point. I feel that this anvil
is at the lowest end of the weight spectrum for doing any useful blacksmithing.
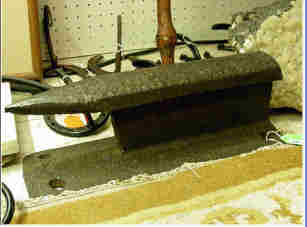
Important!!!:
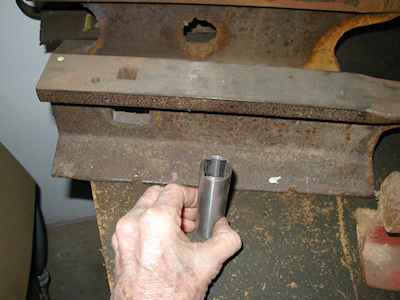
Note that I made small notches in the base of this anvil for fastening it to a stump. In the past, I simply drove nails into the stump
besdie the edge of the base and belt them over. That's okay, but the anvil can slip sideways a bit. So by nailing into these notches, the anvil can't go anywhere.
I think it is especially important to hold these rail anvils down since they are generally lighter than conventional blacksmith anvils.
You don't see many Rail Anvils with hardy or pritchel holes.
But to me, you really need them, the hardy hole at least, if you are going to do blacksmith work to any degree.
Another Approach for a stronger Rail Anvil Horn
Most makers of Railroad Rail anvils do several things that make the horn weaker. Here, I try an unconventional approach, making a rail anvil
that is kinda backwards to produce a thicker horn.
Making the Rail Anvil Horn Stronger
I got this from wikipedia rail profile:
"The American Railway Engineering Association (AREA) and the American Society for Testing Materials (ASTM) specified
carbon, manganese, silicon and phosphorus content for steel rails. Tensile strength increases with carbon content,
while ductility decreases. AREA and ASTM specified 0.55 to 0.77 percent carbon in 70-to-90-pound-per-yard
(35 to 45 kg/m) rail, 0.67 to 0.80 percent in rail weights from 90 to 120 pounds per yard (45 to 60 kg/m),
and 0.69 to 0.82 percent for heavier rails. Manganese increases strength and resistance to abrasion.
AREA and ASTM specified 0.6 to 0.9 percent manganese in 70 to 90 pound rail and 0.7 to 1 percent in heavier
rails. Silicon improves steel by increasing density. AREA and ASTM specified 0.1 to 0.23 percent silicon.
Phosphorus and sulfur are impurities causing brittle rail with reduced impact-resistance. AREA and ASTM
specified maximum phosphorus concentration of 0.04 percent."
Is there any disagreement with that?
Interesting to me:
I got 6 cuts with one Doall Imperial 100 band saw blade in used 88# (or so) rail before it started
to go dull. I'd guess that means that those rails are NOT fully hardened when they leave the mfr and they don't
work harden to the point where they are fully hard by the time they are removed from service.
Why do I have that much rail laying around?
It's the left over from my son's 39 foot high Tyranosaurus Rex. He used 2 18 foot lengths to reinforce the legs.
That's all for now. I will add to this page as I find time to work on these railroad rail anvils some more.